Showing posts with label Winter Foliage. Show all posts

Wednesday, 26 November 2025

Introducing MCM Baubles stencil and masks

Good morning. 
Earlier this week Bev introduced a brand new stencil to Uniko's stable, MCM Baubles. It comes as a stencil but also contains the masks, always useful I think. Yesterday Bev and Anita showed you what inspirational ideas they had, today Izzy and I are giving you some more inspiration using the new release and of course the MCM Bauble stamp set.

Here is my first idea, very much along the lines of this card I made for the Uniko VIP FB challenge but it was also inspired by the moodboard at JUGS.


For my earlier make I used masking tape to mask off a simple tree shap but this shape would be very fiddly to mask without the stencil!
I stated by placing a piece of white card under the largest bauble in the stencil, securing with masking tape before adding it to my MISTI. The openings for the rest of the baubles were filled with the masks and a piece of scrap paper added across the bottom of the card to avoid any unwanted ink!
Then I stamped away using Seasons of Beauty and Winter Foliage to fill the opening. Removing the stencil and masks relevealed the floral center in the shape of the bauble. The hanger and string from the MCM Bauble set were then stamped with Versamark and embossed with gold EP. The sentiment was simply added with black ink.

My second card was made using just the stencil to create a soft background of baubles inking a white panel with Altenew's Coral Bliss ink, moving the stencil as I went. Once the background was completely covered, I stamped a few strings with the stamp from the stamp set.  


The focal point was created by inking the ornament from the stencil with Altenew's Heart Beat then adding the hanger and string by stamping. It looked a bit sad just plain so thought about using the other stamps from the set but instead just doodled some patterns with a sparkly red gel pen and a bit of dark grey too. The hanger looked a bit lost so I inked over that too with the red pen. I still wasn't satisfied, so created a fine frame using some red glitter paper and Altenew's Fine Frames die. A simple sentiment stamped on some inked card and mounted on a scrap of glitter paper completes.

So that's all from me for the moment but there'll be more inspiration from more of the team tomorrow and Friday before our release day blog and giveaway on Saturday.

Joining in over at:-
 

Tuesday, 11 November 2025

Uniko VIP FB Challenge - Christmas

 Morning all. Uniko is launching their November VIP FB challenge today, where the theme is 

ANYTHING GOES CHRISTMAS

This is a great chance to crack out those Uniko goodies and get some Christmas cards made! Here's one I made after seeing a reel on FB over the weekend.


The actual card was fully freehand but I loved how the artist used a simple triangle which was then filled with festive foliage to suggest a tree. For my take I used an assortment of sets but mainly Season of Beauty and Winter Foliage. I'm also linking up to a few other challenges, Time Out where my favourite Holiday to celebrate is Christmas. The Male Room want a floral masculine card, I think that Christmas cards are a perfect way to incorporate that theme. Allsorts are focusing on Christmas cards and Simply Clean & Simple want winter/holiday cards.

To begin I took a panel of Mixed Media Paper and masked off a simple triangle with masking tape. I made sure that it was low tac and that it was pressed down onto the paper, no leaks wanted here! Then using the poinsettia stamp I inked up with Altenew's Heart Beat and then stamped again with just water to blend out the colour. Before it dried too much I added the second layer with Altenew's Vineyard Berry. I did get a bit of bleed but it didn't bother me too much! The green sepals were stamped with the reverse of the stamp in Fresh Leaf and then again with the detail in more Fresh Leaf.

Next I added some holly leaves from Winter Foliage and Altenew's Evergreen ink, followed with the berries in more Vineyard Berry and a few evergreen boughs in Altenew's Moss. Using a smaller cluster of berries stamp, I used Altenew's Coral Bliss to fill in some spaces, finally filling in with some small freehand leaves in gold paint. After leaving it to dry while I made tea, I then carefully removed the masking tape and stamped the star from the Pattern Building Christmas Tree in Wild Honey DI, then painted it with more gold paint. 

My pot/trunk sentiment is from Peace on Earth, which I cut in half to create the stacked look. Don't panic I can still use it as it was intended!! I embossed it with some gold EP. Once trimmed down my panel was added to a red panel and added to an A6 top fold note card. MM paper is the whitest w/c paper I've found but still looks awful on white or sometimes even on off white cardstock so a coloured background works best.

So that's all from me but please join us over on FB for a chance to win a little gift from Bev and of course just have some fun!


Joining in over at:-


#836 Christmas Cards
  
Holidays or Winter

Friday, 11 July 2025

Christmas in July Uniko's FB VIP Challenge

 Morning all. As it's the 11th of the month it's time for a new challenge over at Uniko's VIP FB page. All through July we at Uniko are celebrating Christmas in July, so that's our theme for this months competition. Here's a very simple OLC using Winter Foliage for your inspiration.


I apologise for the pic, it was either too dark or too bright for a photo today!

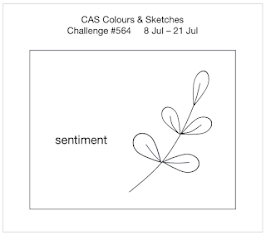
I used the sketch at CAS Colours and Sketches along with the OLC option at ABC Christmas Challenge as inspiration, it's also Christmas in July at CAS on Friday. All elements are simply stamped using DIs, but I used a small blending brush and more Peeled Paint for the evergreen bough. A simple gold embossed sentiment completes.


Joining in over at:-

O is for OLC

Christmas in July

Friday, 30 September 2022

BA Inspiration at Uniko

 Good morning folks, it's my turn for a little bit of BA inspiration over at Uniko with a pair of Christmas makes.


All the details can be found on the Uniko blog.

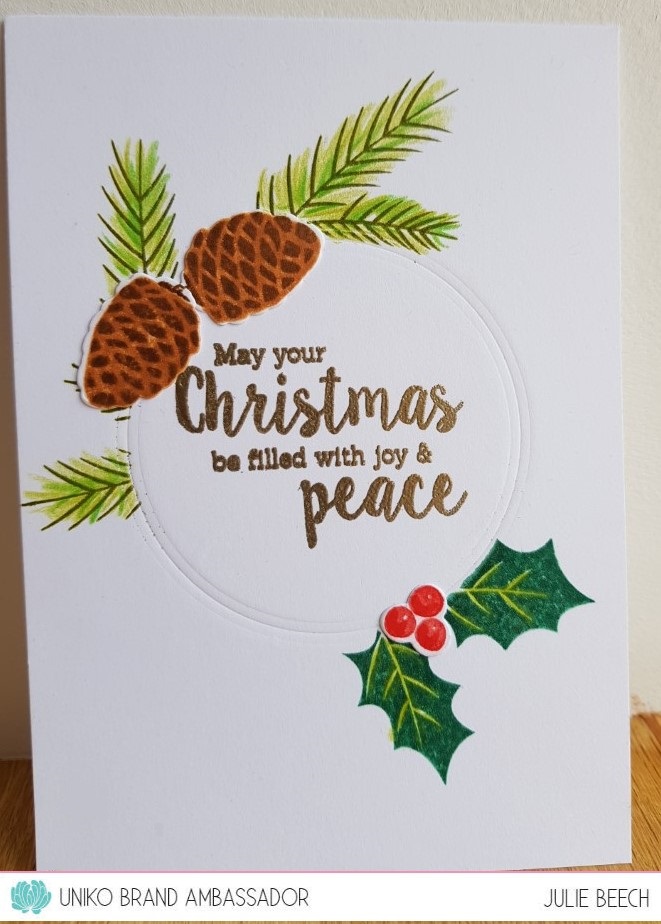
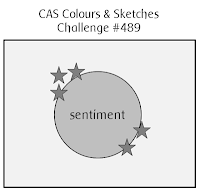
This card I made after seeing the latest sketch at CAS Colours and Sketches.


As you can see, my card is portrait rather than the landscape format of the sketch.
To start, I used a circle die to emboss my panel, then cut a mask from a Post-It using the same die.
I then added the mask over the embossing and stamped the holly leaves and evergreen foliage. I stamped the holly berries and a couple of pine cones and used the dies to cut them out. The evergreen bough was coloured in with a couple of green pencil crayons as were the veins on the holly leaves for extra interest.
Removing the mask, I stamped the sentiment in Versamark and embossed in gold EP before adding the berries and cones with glue.

Check out the Uniko blog for details of my other card.

Joining in over at:-

Monday, 22 August 2022

Uniko BA Inspiration

 Afternoon crafters, I'm sharing a couple of cards I made for a BA post over at Uniko using the Winter Foliage stamp, die and stencil together with the Christmas Wishes stamp set.

I was inspired by the latest challenge at CAS Christmas Card Challenge where their cue word is PINE, hence the use of Winter Foliage!

Here are the two cards I created, full details are over on the Uniko blog.


Joining in over at:-


Friday, 19 November 2021

Uniko Challenge

Morning all. It's time for a brand new challenge at Uniko.
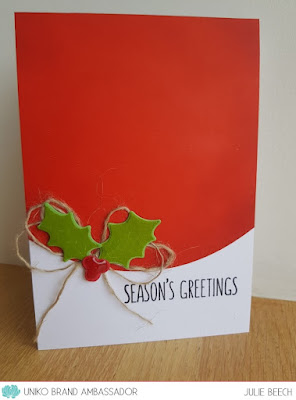
Here's my card based on the twist this time.


Its a very simple card, just a couple of stamped holly leaves and berries from the Winter Foliage stamp set and the matching dies. the leaves were stamped on green card and although the veins showed up to begin with they had faded by the time I took the photo! The berries were stamped with red on red and then some Glossy Accents added on top.
From a panel of red card, I cut a curve using an Avery Elle set and knocked back the colour with some Rusty Hinge and Barn Door DI around the edges, before adding it to a white, A6 note card. The thread is 1/3rd of a strand of twine as it was too thick originally. I made a rough bow and glued it to another die cut set of berries. The leaves were added and then sandwiched by the glossy accented berries and glued along the edge of the join after I'd stamped the greeting from Christmas Sentiments.
So where will the theme take you? We'd love to see you in our gallery. For more inspiration please check out the rest of the team and our GD here. 

Joining in over at:-

Thursday, 28 November 2019

BA @ Uniko

Hi, I'm up over at Uniko with a little bit of Christmas card inspiration.
For details on how I made these cards check out the Uniko blog here.


Saturday, 26 October 2019

Uniko Christmas Release Inspiration and Blog Hop

Morning all.
If you've been reading Bev's blog posts over the last week or so, you'll know that she has released a few brand new Christmas inspired stamps and also some dies, some to coordinate with existing stamp sets and some to stand alone. 
So as is tradition we are having a blog hop and giveaway, YAY!
So comment here before you hop along to the next stop for a chance to win and get some Christmas Uniko inspiration as you go. You know it's never too early to start those Christmas cards!
So grab a cuppa and settle in 'cos this is a long post!

My first card uses a stencil launched last year and a brand new large die cut snowflake. I spent many years looking for a large die so Bev has answered my prayers!


First I took a panel of white card and stencilled around the edge with Salty Ocean DOx and the 'Let it Snow' stencil. I started off pale and increased intensity as I went around. I also added a light colouring of the ink closer to the centre to take away the whiteness of the card. When dry the different layers give a sense of depth.
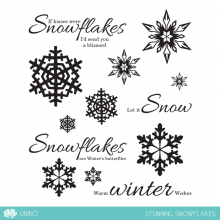
I trimmed the panel to just a shade smaller than an A6 base card and edged the cut edges with a little Salty Ocean DOx. Centring the die, I cut the snowflake but was careful to keep the small cut outs for replacing later. The inked and die cut panel was glued to an A6 white base card and then a blue fun foam snowflake was added back into the opening, adding back the small diamonds from the first die cut. The snowflake was then glued over the fun foam one, matching the pattern. My sentiment is from an older snowflake set,  Stunning Snowflakes, stamped in black onto a white panel.

My second card uses Background Blocks- Scandinavian Christmas and Winter Foliage stamps and matching dies.


To start I stamped the BB Scandinavian Christmas and heat embossed with white EP, then cut a circle  from it with a die. I inked this circle with Salty Ocean DOx, keeping the ink darker towards the edges. To darken the edges further, I added some Blueprint Sketch DOx to the very edge.
On a separate piece of white card, I stamped the evergreen bough from Winter Foliage twice in Altenew Olive, adding further contrasting green with my Zig pens before die cutting with the matching die.
From a scrap of matte silver card, I cut an ornament hanger and attached it to my inked circle, then threaded it with some silver chord and added a silver bow. 
I arranged the foliage branches in the top left of my base card, added my 'bauble' on pads and stamped a sentiment from Festive Sentiments in blue.

My third card uses the new Winter Foliage stencil and the gorgeous poinsettia from Season of Beauty.


For the background panel I used the trapped colour technique, inking through with Versamark onto a panel of W/C card inked with Antique Linen DI, embossing with clear EP then washing away the DI with a paper towel and water.
The poinsettia and leaves from Season of Beauty, were stamped then fussy cut with a few dots of glossy accents in the center, a banner sentiment completes. 

My next card uses Winter Foliage stamps and dies, the new Festive Sentiments Outlined as well as Christmas text from Season of Beauty and other festive sentiments.


Using my MISTI, I arranged the sentiments to cover an A6 panel before stamping on red card and embossing with clear EP. The white panel was cut using a border die before the foliage and sentiment were stamped. The pine cones from Festive Foliage were stamped and die cut and slipped under a wrap of jute twine. The white panel was then popped up on pads to complete.

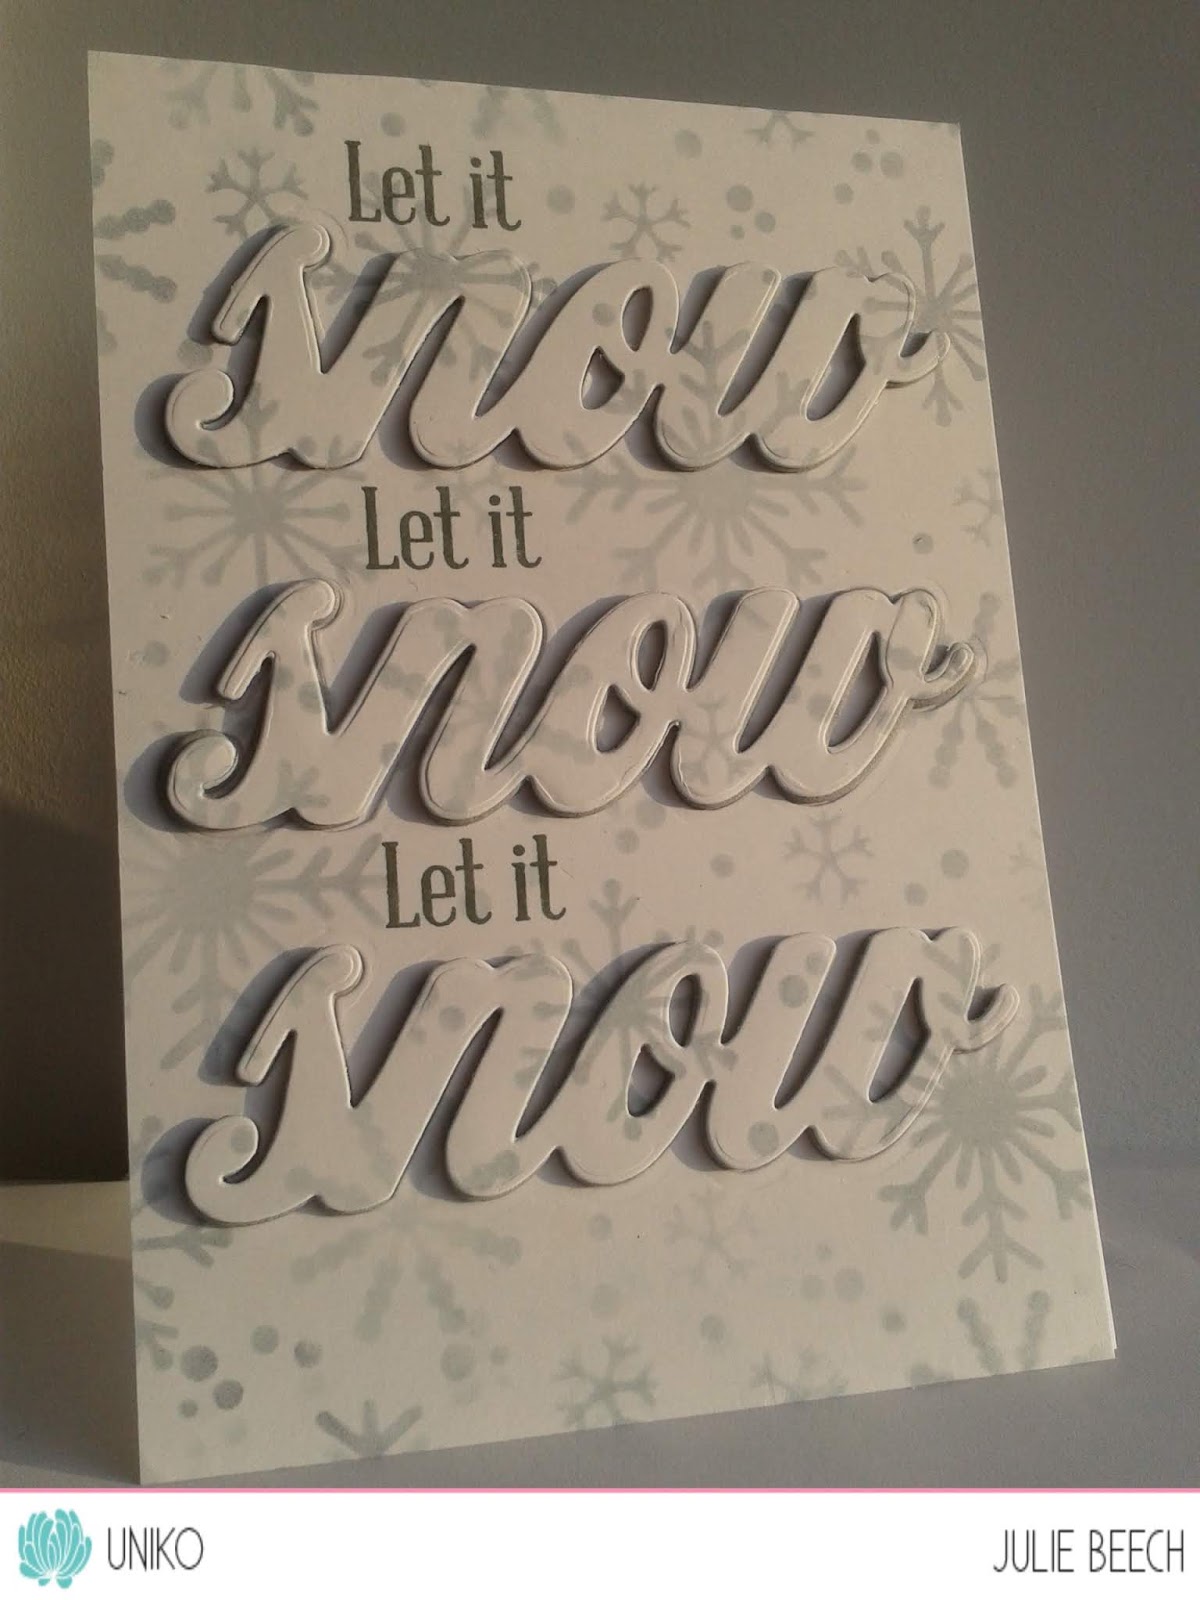
Finally, I've used the new dies Big n Bold Snow, with the Let it Snow stencil and Big n Bold Snow sentiment 'Let it'.


Using the stencil, I inked Weathered Wood DI with varying levels of intensity over a panel of white card, then cut three of the snow words from it, I used grey fun foam to cut three more snow words and stamped the Let it in dark grey ink. The main panel was glued to an A6 white card base, gluing the inked and foam words together but retaining the small inked bits to one side. The popped up words were glued in place and the retained bits popped flat into the appropriate spaces to complete the look.
And breathe, told you it was a long post!

Now you can check out the rest of the team's inspiration, but you may need to refresh that cuppa!
Julie  - that'll be me
Linda

Be sure to comment along the hop for your chance to win the ENTIRE Release! You have until Midnight GMT 2nd November 2019 to leave a comment and a winner will be announced shortly after.

Happy hopping!


  FestiveSentimentsPPMostWonderfulPP

StunningSnowflakesPP

Sunday, 28 October 2018

Introducing...Winter Botanicals: Sweet Broom & Quilted Stencil

Good morning.
Its day 3 of the Christmas launch over at Uniko. Today we showcase a stencil and addition to the Botanicals range.
Well I don't know about you but its getting rather parky around these parts. We even had a hailstorm on Friday, winter is rapidly approaching. So that was the inspiration for this card using the Quilted stencil. 


I teamed it up with the previously released Winter foliage set to create a WOW card.

To create the quilted effect panel I inked through the stencil on the diagonal with Weathered Wood DI over white card, then removed it and added shading to create more depth using the edge of the stencil and more of the DI. Following the pattern created by the stencil I added soft colour, working off the sharp edge of the stencil towards the stenciled card, careful not to add too much. When added in one direction, I turned my piece 90' and repeated to get the shadow effect. 
I stamped the holly foliage with the same DI and embossed it with clear EP before fussy cutting. The berries were stamped and embossed with silver EP and a few die cut branches complete the spray.
To add a little extra bling I added some small PPP sequin gems to the center of each cross. My sentiment from previously released Simply Said Christmas was stamped and embossed with silver EP.
My quilted panel was mounted on some silver glitter paper and the spray attached before adding to my white base card.

Also previewed by the DT is the new Winter Botanicals: Sweet Broom stamp set.

For more details check out the rest of the DT here.

Julie -that'll be me
Sarah P

Pop back tomorrow for the final preview before the full release and blog hop.

Joining in over at:-
Grab our logo
pearls and or gems