Monday 28 October 2019

More BA Inspiration

Afternoon peeps.
Just popping by to say I'm up on the Uniko blog with some more background sentiment panel ideas for Christmas cards.

For more details check out the Uniko blog here but these are the finished cards.


Joining in over at:-


Grab our logo
Make your own backgrounds


Saturday 26 October 2019

Uniko Christmas Release Inspiration and Blog Hop

Morning all.
If you've been reading Bev's blog posts over the last week or so, you'll know that she has released a few brand new Christmas inspired stamps and also some dies, some to coordinate with existing stamp sets and some to stand alone. 
So as is tradition we are having a blog hop and giveaway, YAY!
So comment here before you hop along to the next stop for a chance to win and get some Christmas Uniko inspiration as you go. You know it's never too early to start those Christmas cards!
So grab a cuppa and settle in 'cos this is a long post!

My first card uses a stencil launched last year and a brand new large die cut snowflake. I spent many years looking for a large die so Bev has answered my prayers!


First I took a panel of white card and stencilled around the edge with Salty Ocean DOx and the 'Let it Snow' stencil. I started off pale and increased intensity as I went around. I also added a light colouring of the ink closer to the centre to take away the whiteness of the card. When dry the different layers give a sense of depth.
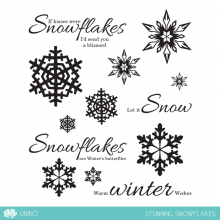
I trimmed the panel to just a shade smaller than an A6 base card and edged the cut edges with a little Salty Ocean DOx. Centring the die, I cut the snowflake but was careful to keep the small cut outs for replacing later. The inked and die cut panel was glued to an A6 white base card and then a blue fun foam snowflake was added back into the opening, adding back the small diamonds from the first die cut. The snowflake was then glued over the fun foam one, matching the pattern. My sentiment is from an older snowflake set,  Stunning Snowflakes, stamped in black onto a white panel.

My second card uses Background Blocks- Scandinavian Christmas and Winter Foliage stamps and matching dies.


To start I stamped the BB Scandinavian Christmas and heat embossed with white EP, then cut a circle  from it with a die. I inked this circle with Salty Ocean DOx, keeping the ink darker towards the edges. To darken the edges further, I added some Blueprint Sketch DOx to the very edge.
On a separate piece of white card, I stamped the evergreen bough from Winter Foliage twice in Altenew Olive, adding further contrasting green with my Zig pens before die cutting with the matching die.
From a scrap of matte silver card, I cut an ornament hanger and attached it to my inked circle, then threaded it with some silver chord and added a silver bow. 
I arranged the foliage branches in the top left of my base card, added my 'bauble' on pads and stamped a sentiment from Festive Sentiments in blue.

My third card uses the new Winter Foliage stencil and the gorgeous poinsettia from Season of Beauty.


For the background panel I used the trapped colour technique, inking through with Versamark onto a panel of W/C card inked with Antique Linen DI, embossing with clear EP then washing away the DI with a paper towel and water.
The poinsettia and leaves from Season of Beauty, were stamped then fussy cut with a few dots of glossy accents in the center, a banner sentiment completes. 

My next card uses Winter Foliage stamps and dies, the new Festive Sentiments Outlined as well as Christmas text from Season of Beauty and other festive sentiments.


Using my MISTI, I arranged the sentiments to cover an A6 panel before stamping on red card and embossing with clear EP. The white panel was cut using a border die before the foliage and sentiment were stamped. The pine cones from Festive Foliage were stamped and die cut and slipped under a wrap of jute twine. The white panel was then popped up on pads to complete.

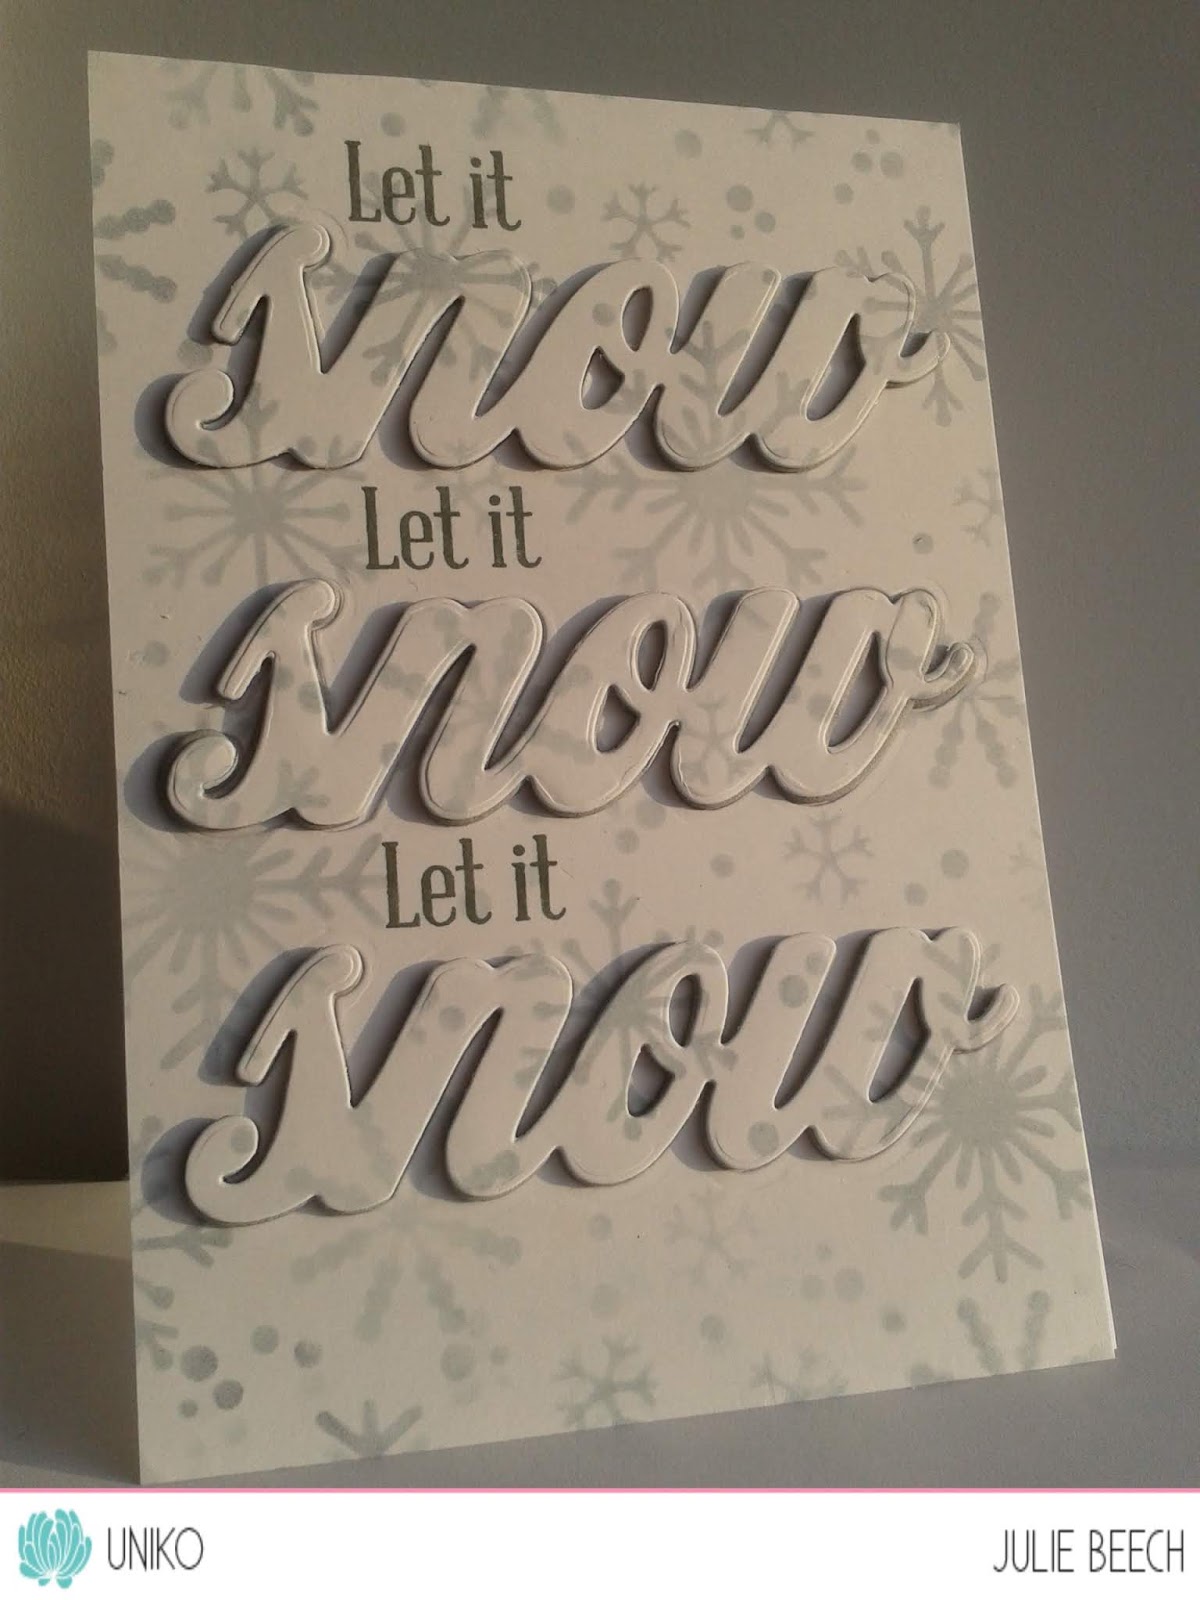
Finally, I've used the new dies Big n Bold Snow, with the Let it Snow stencil and Big n Bold Snow sentiment 'Let it'.


Using the stencil, I inked Weathered Wood DI with varying levels of intensity over a panel of white card, then cut three of the snow words from it, I used grey fun foam to cut three more snow words and stamped the Let it in dark grey ink. The main panel was glued to an A6 white card base, gluing the inked and foam words together but retaining the small inked bits to one side. The popped up words were glued in place and the retained bits popped flat into the appropriate spaces to complete the look.
And breathe, told you it was a long post!

Now you can check out the rest of the team's inspiration, but you may need to refresh that cuppa!
Julie  - that'll be me
Linda

Be sure to comment along the hop for your chance to win the ENTIRE Release! You have until Midnight GMT 2nd November 2019 to leave a comment and a winner will be announced shortly after.

Happy hopping!


  FestiveSentimentsPPMostWonderfulPP

StunningSnowflakesPP

Friday 25 October 2019

Happy belated 6th Birthday STAMPlorations

Good afternoon peeps.
This week at STAMPlorations we are belatedly celebrating the 6th birthday of the wonderfully talented Shery setting up her company with a blog hop and linky party!
We are a little bit late because of real life getting in the way of crafting.
Never mind, we are here now. Here are two cards I made using the  new Zen Doodled Birthday Cake coverplate die.

  
One for a female and one that is gender neutral but would work well for a guy.

I used the coverplate die in two different ways but the starting point was the same.
To begin I embossed a panel of white card with the coverplate die. Just use the embossing sandwich for your machine, but don't forget to use a silicon mat!


For the card above I then used my Copics to colour the embossed image, you don't need to be too careful as the next stage will cover any raggedy edges.
To create the finished effect, die cut a couple of the plate dies from white card, glue them together and then place the finished die cuts over the colouring. Its one way of getting the embossed look with Copic colouring, and you don't have to be too neat either!
After trimming away the edges of the coloured base, I placed it on a 5x7 white base card to plan where to put the sentiment. I used happy happy Birthday from Party Time. Once stamped I glued the panel in place.

The second card starts with the same embossed background but this time I used the waste from the die cut to add the colour. The embossing creates a subtle background and shows where to place the coloured die cut leftovers.


This time when I used the coverplate die, I added some Gladwrap to the top of the coverplate. It's slightly tacky so keeps all the little bits in the die until its removed from the machine.
Before removing the wrap from the plate die, I added another piece of the Gladwrap to the reverse, again to keep the bits together, then carefully remove the top wrap layer and then the coverplate, push any loose pieces back into the 2nd layer of wrap. I could now add colour with my Copics. Again, you don't need to be too accurate with the colouring as the outline will not be used.
Once coloured you can reuse the original panel of Gladwrap by adding to the front of the coloured panel, pressing firmly from the back before removing the outline and 2nd piece of wrap. 
Using a fine glue pen, add glue to the areas that constitute the cake and candle, then carefully overlay the wrap and adhered pieces onto the glued area. Press firmly, and then leave until dry before removing the wrap. Any odd bits still left on the wrap can be glued down individually. 
I agree it is a bit fiddly but well it's worth the effort!
Instead of a standard side fold card, I made an easel one.

On the inside of the card base I made a stop for the coloured panel to rest against, using some of the same blue card and some white card coloured to match the cake with a Copic marker. The strip was popped up with foam after I added the die cut birthday and then stamped Happy from Balloons and Banners. I was going to use the Happy Birthday die but betwixt storage and cutting machine it went AWOL and remains so! Absolutely no idea where its gone, but my craft table is looking a little tidier!

So on to the fun bit -

No photo description available.


Prizes:

  • ONE (1) winner of $40 worth of products in her wishlist
  • THREE (3) winners of a $10 gift certificate - randomly drawn from comments left on the birthday hop posts and designers’ blog posts
  • THREE (3) winners of a $15 gift code - randomly drawn from entries in the birthday linky party
  • ONE (1) winner of a $50 gift code - randomly drawn from entries in the birthday linky party
  • A few surprise winners of products and/or gift certificates


Join in our Birthday Linky Party:
  • Linky open from October 21 to November 5
  • Link up any birthday- or celebration-themed project
  • Limit to 3 entries per player
  • Linky found on the Day 1 post:
  • Players must link to the blog post and display graphic in their blog post to qualify for the prize; players linking from their Instagram/Pinterest/Flickr/FB/SplitcoastStampers accounts: must tag @stamplorations and use hashtag #stamplorations6thbirthday 
Info on Wishlist Linky Party:

  • Linky open from October 14 to November 5
  • Link up STAMP wishlist for 1 entry
  • For extra entry: mention the linky party, link to it, and display the graphic in a blog post
  • Linky found here

So what are you waiting for?

I'm joining in over at:-


  CREATIVE INSPIRATIONS
       Masculine or Halloween/Autumn    

Tuesday 22 October 2019

Ho, Ho, Ho

Morning all.
The weeks are whizzing by and it's time for a brand new challenge for you over at Cardz4Guyz.
This time our theme is:-

FOOD/ DRINK

As my collection of Christmas cards has not been added too much since last year, I thought I would hunt through my Christmas stash and found this little pudding stamp and die set from Clearly Besotted. The theme at the Paper Players and CAS on Friday is to include a large word or sentiment in a CAS design, so this is what I came up with!


I stamped the largest of the Christmas puddings, then die cut them to make into the 'O's of my sentiment. The holly sprigs and berries were created in the same way before adding them to the top of the puddings. The 'H's were cut from red card as well as red fun foam using an Altenew alphabet, sticking the two layers together before adding to a die cut rectangular panel. A piece of matching red card was added to create a thin frame before adding to an A6 base card.
Simples.
Check out the rest of the Cardz4Guyz DT here for more food or drink inspired creations.

Joining in over at:-


For your blog
Big Sentiment

Tuesday 15 October 2019

STAMPlorations October Challenge reminder

Good afternoon.
Just popping by to remind you that the current challenges over at STAMPlorations have a couple more weeks to run so you've still got time to join in. Here's a card that I made for the Theme and Photo Prompt challenge.

No photo description available.

Looking at the photo, I immediately decided to go for another dark background but this time went with the gold mandala style image on the left of the pic as my inspiration.

Before stamping, I cut an A6 panel of black card, then cut the centre out using one of the Crazy Double Stitched rectangle dies. Placing the card in my MISTI  and replacing the die cut rectangle into the centre, allowed me to stamp the images from Bloomdala Bliss with Versafine but add different EPs to each panel. For the central one I used fine gold the background was clear.
After covering the whole are, I removed the centre panel and coloured it using my Polychromos again.
The sentiment from Bloomful, was stamped and embossed to match the mandalas before popping it up with some fun foam over a base card to which I had already attached the background.

So that's all from me for the mo but please check out the rest of the DT here for lots of great inspiration using STAMPlorations products.


Monday 14 October 2019

Small is beautiful

Evening folks.
I'm back to announce the start of another challenge over at Perfectly CAS.
Here's what I came up with.


My design did start as something else completely but then I decided it wasn't CAS enough, so had to think again, more of that card at a later date!
This month I've used the middle third for my design, which is loosely based on the current CAS(e) this Sketch layout.
The 5 bars are represented by the letters of happy and the stamping was kept to those as well, the sketch also reminded me of this card from a couple of years ago. My sentiment is incorporated with the stamping.

The original idea was to use the die cut outlines of happy but I used the die cut letters instead, which I stamped with some of my smaller flower images whilst they were temporarily adhered to a strip of Post it tape. I used a couple of Altenew sets containing small flower stamps, Vintage Flowers and Wild Flower Garden and the colours from their latest challenge. The die cut letters are also from their large alphabet die set.
Once I was happy with the stamping, I removed the letters and added a die cut foam letter to each of them so that they would pop up from the background panel. Before gluing down permanently, I stamped the Birthday from STAMPlorations Balloons and Banners in black.

For more CAS birthday inspiration, check out the rest of the team here.

I'm joining in over at:-


Take It, Make It Challenge

Wednesday 9 October 2019

Guesting at Color Throwdown

What am I doing posting this early on a Wednesday morning?
Well I'm here as the guest over at Color Throwdown!
I won their challenge with this card and was asked to be their Guest Star Stamper for this week's post.
Here is my card for your inspiration.


I've used the colours from this week's swatch plus some kraft card for the base and frame.


The stamp set used is a cute new one from MFT called Piles of Fun, that I picked up after my last Copic class up in Warrington, I couldn't resist the cute woodland creatures.

I stamped each of the coloured elements with black Memento ink before using Copics to colour, then fussy cut them.
My frame was cut from kraft with an MFT frame die and some outline leaves from the set were stamped in the centre with Peanut Brittle Memento. They were much darker when stamped originally but even with two inkings, they don't show up that much against the kraft but it adds a little added texture to the background.
The little mouse was glued flat and the barrel and leaves popped up on pads, as was the frame, once I'd stamped the greeting from the set. I think the mouse looks like he's blowing a kiss of thanks!
Please check out the fab DT inspiration over at CT and then join us in the gallery.

Joining in over at:-


Stamping Sensations
Trees and/or leaves and/or Autumn

New Badge!

Tuesday 8 October 2019

You are Freakin' Awesome

Morning all.
It's time for a new challenge over at Cardz4Guyz. As the witching season is almost upon us we've gone all spooky on you! However if you don't make those sort of cards, then we have an alternative for you.

SPOOKY or USE ORANGE

Here's my take on the 'Spooky' theme.


All it is is a panel of card wrapped with torn paper inked with Old Paper DI, a couple of red googly eyes and some fangs dipped in Nuovo red Crystal drops popped up over a panel of kraft card! The sentiment, embossed with white EP on the kraft base is from Create a Smile.
Simples.
For more masculine inspiration, why not check out the rest of the team here, then join in.

I'm joining in at:-


For your blog
Make a masculine card

Want our Badge
Clean and Simple

Tuesday 1 October 2019

Theme photo @ STAMPlorations

Morning and welcome back!
STAMPlorations have been on their summer vacations but the DT are rested and raring to go with the new revamped challenges. Instead of being on the CUTplorations team, I'm hoping to inspire you with the rest of the theme and photo challenge team!
So without further ado here is my first card.

It was inspired by this photo.

No photo description available.

My focus was on the bowl of flowers in the centre and went from there.
I started by masking off the top half of the vase from the Just Because set and stamping on a panel of black with Versamark, then heat embossing with gold EP. The group of succulents from Thankful and Blessed set were stamped in Versamark so that they hung over the edge of the stamped bowl. More gold embossing  followed. Then I added the rim of the bowl free hand with a Versamark pen and heat embossed with gold EP.
As I stamped on black, I used my Prismacolour pencils in white, tan, green, blue and purple to colour the image. Using the smallest of the Crazy double stitched rectangle die cuts, I cut out the finished image, mounted it on a slightly larger panel of gold, then onto a plain black card base. The thank you, from For the Birds, was stamped and embossed with the same gold EP to complete.

So what will inspire you we'd love to see, so please share with us in the gallery.