Showing posts with label Uniko Brand Ambassador. Show all posts

Tuesday, 11 November 2025

Uniko VIP FB Challenge - Christmas

 Morning all. Uniko is launching their November VIP FB challenge today, where the theme is 

ANYTHING GOES CHRISTMAS

This is a great chance to crack out those Uniko goodies and get some Christmas cards made! Here's one I made after seeing a reel on FB over the weekend.


The actual card was fully freehand but I loved how the artist used a simple triangle which was then filled with festive foliage to suggest a tree. For my take I used an assortment of sets but mainly Season of Beauty and Winter Foliage. I'm also linking up to a few other challenges, Time Out where my favourite Holiday to celebrate is Christmas. The Male Room want a floral masculine card, I think that Christmas cards are a perfect way to incorporate that theme. Allsorts are focusing on Christmas cards and Simply Clean & Simple want winter/holiday cards.

To begin I took a panel of Mixed Media Paper and masked off a simple triangle with masking tape. I made sure that it was low tac and that it was pressed down onto the paper, no leaks wanted here! Then using the poinsettia stamp I inked up with Altenew's Heart Beat and then stamped again with just water to blend out the colour. Before it dried too much I added the second layer with Altenew's Vineyard Berry. I did get a bit of bleed but it didn't bother me too much! The green sepals were stamped with the reverse of the stamp in Fresh Leaf and then again with the detail in more Fresh Leaf.

Next I added some holly leaves from Winter Foliage and Altenew's Evergreen ink, followed with the berries in more Vineyard Berry and a few evergreen boughs in Altenew's Moss. Using a smaller cluster of berries stamp, I used Altenew's Coral Bliss to fill in some spaces, finally filling in with some small freehand leaves in gold paint. After leaving it to dry while I made tea, I then carefully removed the masking tape and stamped the star from the Pattern Building Christmas Tree in Wild Honey DI, then painted it with more gold paint. 

My pot/trunk sentiment is from Peace on Earth, which I cut in half to create the stacked look. Don't panic I can still use it as it was intended!! I embossed it with some gold EP. Once trimmed down my panel was added to a red panel and added to an A6 top fold note card. MM paper is the whitest w/c paper I've found but still looks awful on white or sometimes even on off white cardstock so a coloured background works best.

So that's all from me but please join us over on FB for a chance to win a little gift from Bev and of course just have some fun!


Joining in over at:-


#836 Christmas Cards
  
Holidays or Winter
Sunday, 16 March 2025

Uniko BA Inspiration and Color Hues #106

Good afternoon.
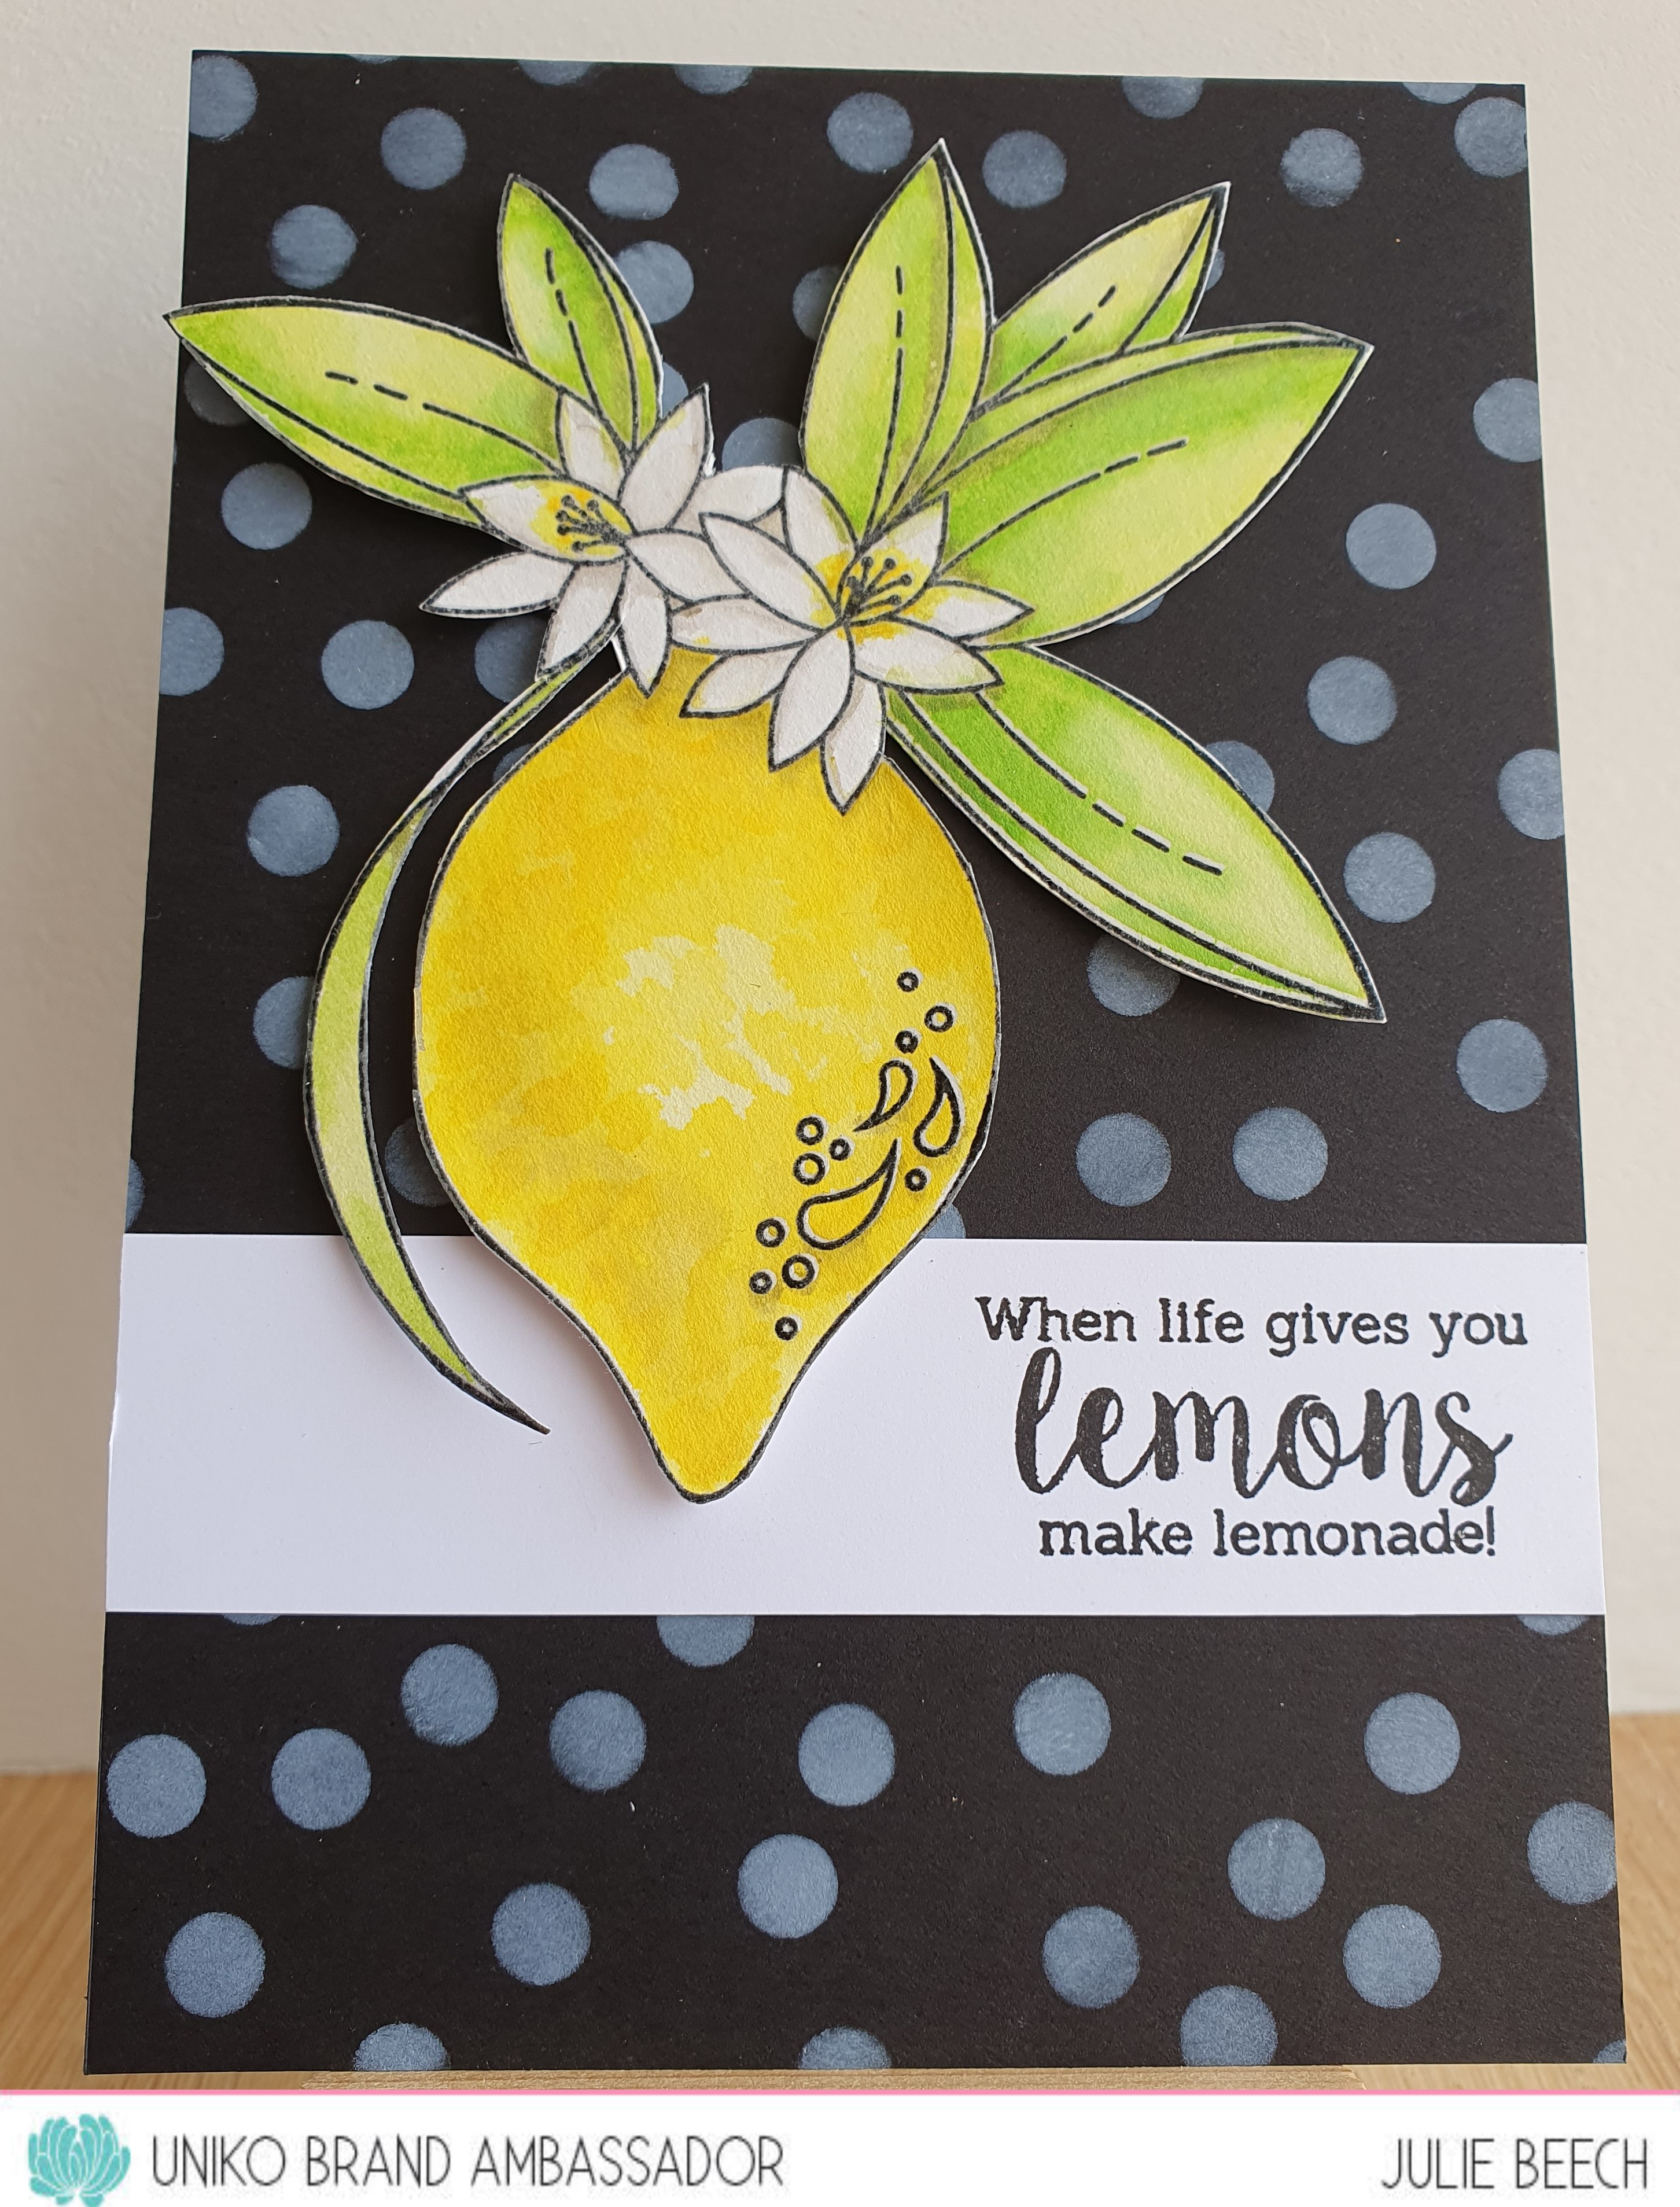
Today it's my turn to host the new colour duo challenge at Color Hues, so I decided to incorporate a Uniko BA Inspiration post too. I chose a fresh spring combo and when I sat down to make my card I decided to give my Organically Zesty stamp set from Uniko a dust off, here's my card.


As you can see I went with the lemon as my focus with the large, fab lemon and blossom from the set, I think it fit the colours perfectly. I could have gone down the spring flowers route but I do like to ring the changes and try not to get in a rut when it comes to my Color Hues duties!

Starting with a panel of black card, I used the Uniko stencil Scattered Polka Dots to ink through with white pigment ink. A sentiment strip with a sentiment from the set stamped in black was added over the top, 2/3rds down the panel.
I stamped the large lemon from the set onto some MM paper with black ink and added clear embossing powder, much cleaner and easier than using Versamark and black EP. To make sure I had enough EP on, I repeated the stamping with Versamark and more clear EP. What did we do before stamp positioners came on the scene?! Smooshing some Altenew ink pads, Lime, Limeade, Fresh Lemon and Maple Yellow, onto a piece of acrylic to use as a palette water coloured the image. I used a grey Zig marker to create some shadow. Finally, I fussy cut the lemon out and mounted it onto my background with pads.

This was my second attempt but here is my first which you can find out more about by checking out the Uniko blog


 So where will these new colours take you. The rest of the Color Hues girls and our very talented GD  Michele have come up with some fab inspiration. We are all looking forward to seeing your makes in our gallery. You've until 29th March @ 9am EDT to get those little grey cells working!

Joining in over at:-


                                             Water colouring


Shades of Green

Tuesday, 11 February 2025

Uniko Facebook Challenge

 To continue the birthday celebrations at Uniko we are having a FB only challenge. Link up at Uniko's FB page for a chance to win! 
All your card needs to be is birthday themed and uses Uniko products.
Here's my card, using Background Blocks - Mid Century Linear and a few other little stamps and doodles to create a masculine monochrome card.


I saw this card by Vicki Dutcher using a background stamp and bold numbers but she didn't say whose stamp it was,  so I thought I would use the MC Linear to create my own.
After stamping the background block on a die cut panel, I overstamped with some small stars and circles from Uniko stamp sets and a bit of freehand doodling with a black fineliner, then mounted it onto a panel of black, only slightly bigger than the stamped panel. A die cut 40 in gold and a sentiment from Simply Said Blocks were added before I completed the card by adding the whole lot to an A6 top folding white base card.


Joining in over at:-

Thursday, 6 February 2025

BA Inspiration - Happy Birthday

Good morning. 

The birthday celebrations are continuing over at Uniko . Today I'm sharing this card using the Remembrance stamp set.

All the details for this make and all the other birthday inspiration can be found over on the Uniko blog.


Joining in over at:-

Digi or Rubber stamps
I have a collection of both but for artsy techniques like this I prefer a solid stamp that I can stamp in a pale ink, mask and manipulate. Water colouring a digi is definitely a no no, the paper won't go through my printer either!

Saturday, 4 January 2025

Reintroducing... Background Builders Flower Power

Good morning!
Welcome to the final day of introductions of Uniko's January release.
Today we are focusing on a RErelease, Background Builders Flower Power. Like others in the series, it consists of strips of floral images that you can use singularly or to cover a larger area. They also coordinate with the Flower Power sets.
Here's my card which uses one of the strip stamps and the matching Flower Power #7 flower head.


I started by stamping a panel of white card with a rainbow of array of daisies, rainbow colours appears to be my theme for this release! I stamped out some of the outline daisies from Flower Power #7 and cut them out using a die from an old Sizzix set that almost matched the outline, adding some Copic to the centers. I stamped the sentiment, THANK on black with Versamark then heat embossed with white EP, the you was simply stamped in black and both were fussy cut. I chose the sentiment as perhaps you might need inspiration for a card at this time of year and it is also the challenge over at MAWTT!
The stamped panel was die cut and mounted onto a slightly larger circle and then onto a small square card.
So what have the rest of the team been up to? Why not check them out?

Bev

Izzy

Julie -that's me


Tomorrow we will be back with the full release and of course our traditional Blog Hop and Giveaway, so until then....

Joining in over at:-

Thank You

Friday, 3 January 2025

Introducing... Ink & Flip Layering Flower Power #8 Stencil and Simply Said Blocks Occasions Clear Stamp Set

Morning all.
Day 4 of the intros for the new Uniko January release sees us focusing on another Ink and Flip stencil and an addition to the Simply Said Block series. 

First off I have a couple of cards made using the stencil, no fancy tricks just two cards, one square, one A6. 


This one is inked with Twisted Citron DI for the outside and the flower is a mix of Kitch Flamingo and Picked Raspberry DI. 

For this rainbow I used a variety of DIs and the central motif was done with Hickory Smoke DI.


I found a couple more of my Doodle Flower sentiments, I need to make some more as they have been getting a battering this week, and added them to the centers of the stencilled flowers.
Although the stencil and technique is the same the end results are so different. One is soft and feminine and the other more jazzy and masculine.

The next card uses the previously introduced Picked Posies Stencil and a sentiment made by combining one of the stamps from Simply Said Blocks Occasions. There are far too many different panels that coordinate with other sets in the series to mention them all here but I've combined the EASTER block with the older HAPPY one.


I had a panel of white card left over from another stencil inking, so used the stencil to fill it before adding to a panel of fresh green card and a couple of strips of silver glitter paper to bling it up. Happy and Easter are popped up on slithers of foam pads. Simples!

So what do you think? Why not check out what the rest of the team have been up to. 

Bev

Julie -that's me


See you back here tomorrow for the final introduction.

Thursday, 2 January 2025

January 2025 Release - Introducing... Flower Power #11and Stencil - Mid Century Modern Stars & Circles

Good morning and welcome to another introduction for the Uniko January release.
Today we are focusing on two new releases a stamp set and a stencil.
My first offering uses the stamp set, Flower Power #11, another in the Flower Power series that you can use with many of the others, especially the themed sentiments. 
Looking for something a little different to make to hi light the versatility of the stamp, I used the sold flower image and stamped it into a wreath style pattern.


No wreath builder required for this simple design simply my MISTI but I did cut my card to be square so that I could rotate it within my MISTI.
Once I'd decided on the position of my first flower head, I stamped the red head, then rotated my paper 90' and stamped again, missing out the next rainbow colour, repeating until four of the heads were stamped. I then removed the stamp and placed it between two of the stamped heads. Closing my MISTI door, I picked up the stamp and inked it with the colour that fit between each colour, rotaing as before to complete the round. A simple sentiment from yesterday's Sparkle Sentiments and a gem complete. 
My finished panel was mounted on some black card and then added to a 41/4" white base card.

This card uses the Mid Century Modern Stars and Circles stencil and is based on a card I saw on Ardyth Percy Robb's You Tube channel. 


I began by inking an A5 panel of white card with rainbow colours and then placed the stencil over the top. More of the same colour was added through to give a tone on tone effect. Thinking what to do with the pretty panel was now uppermost in my mind and whilst I was looking through Pinterest I came across Ardyth's idea. 
I began by cutting a circle from the center of the inked panel and then cut it half. I found it easier to do this whilst the die cut circle was still in place secured with a little tape. On a scrap of thin card, I attached the semi circle and half of the panel and then used the Memory Box die to cut the pattern. 
The MB die I used reminded me of a sparkly sun so the sentiment chose itself really! The sparkle was stamped and embossed with WOW Black Sparkle EP and fussy cut before adding to the center of the sunburst and the other parts simply stamped in black. 
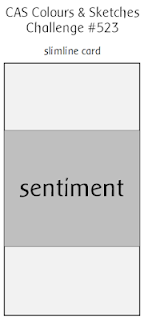
The panel was trimmed and added to an A6 white base card, a few sequins for extra sparkle and I still have half of my panel left for another project!

So that's all from me for the moment but please come back tomorrow for another new intro. In the meantime please check out the rest of the team here -


Wednesday, 1 January 2025

Uniko January 2025 Release - Introducing - Ink & Flip Layering Geometric Gem and Sparkle Sentiments Clear Stamp Set

Morning and Happy New Year!!
So it's also day 2 of introductions for Uniko's New Year release. Today we are featuring another of Bev's ingenious Ink n Flip stencils and a sentiment set that will hopefully add some extra sparkle to your designs!
Firstly here's my take on the stencil.


After my initial play with the stencil, I was quite pleased with the result of using a WOW embossing pen in the spaces of the gem instead of inking with a dauber and Versamark. I added sparkly silver  WOW EP to the first stencilled area and heat set before wiping the stencil and flipping. This time I used silver glitter EP, I love the effect using the different powders gives. The central panel was then cut from my stencilled panel and a die cut semi circle arc from a scrap of gold mirror card using 2 stacked circle dies, creates the suggestion of a gold ring. A simple sentiment in black Memento completes the panel. The panel was then popped up on pads to leave a border over an A6 note card.

My second card uses the Sparkle Sentiments stamp set. As you can see it would link really well with the stencilled diamond but for this card I've used the two different sizes of text and a stamped diamond which I've stamped and embossed with white EP and a few sparkle hi lights in silver sparkle.


Once I'd embossed the text onto a panel of MM paper, I added some Sea Grass Brusho and spritzed with water and let it stand until dry. The excess ink on the embossing was removed with a damp paintbrush and some kitchen towel before the silver sparkles were added. Panel trimmed it was added to an off white base card. 
I'm sure there are lots of wordy sentiments you could come up with using this set and a simple treatment like this will show them off, no artistic input required.

So that's all for today but be sure to check out the rest of the team below.

Bev

Julie -that's me


I'll be back tomorrow with plenty more inspiration.

Joining in over at:-

No option for me this time!

Tuesday, 31 December 2024

Uniko January 2025 Release - Introducing - Layering Picked Posies Stencil

Good morning. 
As promised today sees the introduction of the first of Uniko's January 2025 release.
This new stencil is based on the Craft Stash release of a year ago but in stencil format.
Here's my first card idea channeling an idea I saw on Pinterest here.


I used the 4 part stencil to create a panel on a piece of A5 white card, before cutting out part of the panel with a rectangle die. I'll use the leftovers for another card. Using the blending brushes I'd used for the inking part, I carefully added a soft layer of the same colour over each element.
Next I stamped Happy from Christmas Sentiment in black followed by birthday from the Birthday Sentiments set. Using a white gel pen, I traced around the letters with a steady hand to make the black letters pop against the soft background. My completed panel was then popped up on pads onto an A6 top fold card base.

This next card used the Black Magic technique of white pigment ink on black followed by colour.


To start I used the four stencils to create a white on black image and left it to dry completely overnight. I then repeated the process using coloured inks. I trimmed the panel to leave a border on my A6 white base card and added a sentiment panel from my stash made using Doodle Flowers. I always make a batch of these whilst the stamps are in my MISTI, saves a lot of time. The hi lights on the flower centers didn't show up too well so used a gel pen over the top.

So two different looks using the same stencil but why not check out what ideas the rest of the team have come up with.  

Bev

Izzy

Julie -that's me


See you back here same time tomorrow for another introduction!

Joining in over at:-


Friday, 15 November 2024

Uniko Poinsettia

Morning all. I'm back with another of my inspiration cards for Sparkles. This month we are looking for your makes on the theme of -

CHRISTMAS FLORALS

When I read this I knew exactly which stamp I was going to use, the fab Uniko Pure Florals - Poinsettia. I was unsure about what design I would use until I caught a You Tube video by Michelle Short CASEing Therese Calvird and the rest as they say is history!


In the video, Michelle used some pretty marbled DP but I Didn't have any, so decided to make my own using alcohol ink and Yupo paper, I used what inks I had including Valencia, Flamingo, Dandelion and Coral, with a little bit of gold foiling.
The rest was pretty simple, two large images, black on white, fussy cut and mounted over the inky panel. The Uniko stamped sentiment was embossed with gold EP on black card before being fussy cut. The sentiment was popped up with foam tape and some silver crystals coloured with yellow Copic marker were added to the centers to complete.
That's it, a really simple make, even easier if you have some suitable DP!
For more inspiration please check out the rest of the Sparkles team and then why not join in?

Joining over at:-

Christmas

Wednesday, 18 September 2024

Uniko Autumn Colours

Good morning. 

I'm helping out on the Sparkles Challenge DT up until Christmas and their latest challenge is Autumn/Fall, so I thought I would have a go using some Uniko stash that I haven't used or one not in a while! Here is my card using the Nature's Treasure stencil and the French Script stamp.


On a panel of white card, I stamped the script with Versamark before heat embossing with gold EP, then inked through the stencil, roughly covering the text and trying not to overlap the sprigs.
Rather than use a single colour for each leaflet, I blended a couple to get a graduated effect. The colours used were Mustard Seed, Carved Pumpkin and Vintage Photo Distress Inks. Once the text was covered, I dried the ink and then as the background looked a little too stark, I blended Antique Linen over the panel before trimming and adding to my cream base card. A strip of gold mirror card and a heat embossed Happy Birthday complete.

While I had the inks on my desk I had a play with the MCM shapes stencil adding a stamped element from Nature's Treasures II.


All the details for this are on the Uniko blog

Thanks for stopping by.

Tuesday, 14 May 2024

Uniko Brand Ambassador Inspiration - Seeing Stars

Morning all.
It's time for a brand new challenge over at Cardz4Guyz. This time we would like to see your masculine take on the theme of:-

STARS and/or STRIPES

I decided to go down the stars route and use some of my Uniko goodies.
Here's my inspiration card.


Quite a simple card that I made for my Grandson to give to his Dad on Father's Day, he loves a rainbow!
First I inked three colours of DI, Mustard Seed, Salty Ocean and Picked Raspberry, lightly onto a panel of white card. Obviously when the colours overlap you get a second, but I was careful NOT to mix all three or you end up with a muddy colour. I then used Uniko's Seeing Stars stencil to ink with the same three inks over the top of the soft background, keeping the edges soft. 
Using some more Uniko goodies, I created the central sentiment, fussy cutting the word star and heat embossing white on black the 2 sentiment strips.
While I had my Uniko goodies out, I made a few more cards that you can find out more about here.

Hope to see your takes in the gallery but if you need some more inspiration please check out the rest of the Cardz4Guyz team here. For more Uniko inspiration find more star ideas here.

Tuesday, 5 December 2023

Introducing Uniko Background Blocks Layered Stripes

Good morning Uniko fans. This morning we are introducing another fab Background Blocks stamp, perfect for those hard to make masculine cards. When I first saw the stamp it took me right back to my youth!
Back in the early 70's I sat my GCSE Art exam after devouring the latest edition of Sounds magazine on the bus on the way to the school. On the back page was a selection of Op Art posters for sale and one of them was very like this panel, but on a much larger scale. When faced with the Art paper, one of the possible themes was an abstract painting with the theme of 'One on top of another'. The poster came into my mind and that was it, off I went. If I remember correctly there were some circles involved with my take and grey was also included.


For this card I simply stamped the image in Altenew's Obsidian onto a white A6 note card and added shadow lines with a 4B pencil. The sentiment is from Framed Balloons. A VERY simple design.

Another idea that came into my mind was this.


The overlapping reminded me of a ball of wool, so I stamped it onto a piece of pink DP with Picked Raspberry DOx, die cut a circle from it and cut a tail of 'wool' from some more of the DP.
On a plain white base card, I drew a couple of knitting needles and coloured them with Copics before adding the circle die cut from the panel to which I'd added some DOx around the edges with a blending brush, then the freehand cut tail. To complete, I added the Happy Birthday with pale grey ink.

That's it from me for the moment, but I'll be back tomorrow with another new stamp introduction.
Check out the rest of the team for some of their ideas using the new stamp.

Saturday, 28 October 2023

Uniko October Release in Review and a Blog Hop

Morning Uniko friends. 
As a few of our Brand Ambassadors were late receiving their October stash and were unable to take part in the introductions, Bev has decided to have a  release revisit and of course our usual blog hop and a GIVEAWAY!!

Today, I've got a couple of autumnal makes using the Autumn Serenade and Big n Bold Thankful to share.


These cards use both autumn sets to create a colourful stamped panel of leaves and a Big n Bold sentiment! The trees around here are only JUST turning, many are still quite green but the cherries and Field Maple are showing their colours at last!


I created my panel by stamping the leaves onto white card with a mixture of inks, layering up the colours to give this effect. What did we do before stamping platforms were developed?! If done correctly the colours simply blend together, LOL. 
On another panel I stamped the thanks in 2 phases with WOW brass EP and stamped the Many in Altenew Mangrove Root, a dark ink but not as stark as black would be. My top panel was then die cut at a jaunty angle to reveal the leaf panel below.

My second card uses more of the stamped panel, this time with a nod to the sketch at Colours and Sketches.


The stamped leaf panel was added to a brown, slimline base card and a couple of strips of matching inked card framing it. It is in the middle of the card, I think the photo angle has foreshortened the bottom section! A Simply Said Blocks sentiment in stamped in the same Mangrove Root as before completes. I think this would make a fab masculine card, not too fussy at all. Change the colours and you would have a totally different feel!

That's all from me for now but please check out Bev's and BA blogs for more inspiration.

 Anita

Bev

Izzy


 Now for the giveaway, simply comment along the hop for your chance to win a £20 eGift Code to spend in store. 

Happy hopping!

Joining in over at:-