Thursday 31 January 2019

Pure Florals - Peony

Afternoon folks.
I'm back again to share a card for this fortnight's Seize the Birthday challenge.


This week our topping is -


BLACK AND WHITE

However, if you are not a topping sort of person, you can still join us so long as its a birthday card.


I started by heat embossing in white this fab Uniko peony bloom on a panel of black card. I then stamped another in black on white and trimmed all the leaves away to leave just the bloom. 
Using a MFT scalloped rectangle I cut the black panel and attached it to a white base card, then added the peony bloom with foam pads. My sentiment strip was also added with pads and a few transparent sequins were added to complete.
Check out the DT here for more black and white birthday inspiration.

Joining in over at :-

CAS on Sunday
Birthday

Tuesday 29 January 2019

To the best friend

Evening all.
It's time for another challenge over at ATSM. This week it is -

ANYTHING GOES

Here is my inspiration card for you.


There are a couple of challenges out there that are focusing on friends in one way or another and as my oldest friend loves oranges, I thought I would make a card using the January colours.
I'm afraid I went with the Altenew Rose Flurries dies again, I love them and they are so versatile!

I found some spotty teal DP in my stash and a snippet of Core'dinations teal card there too, so I made a panel to go down one side of my base card then added two roses from the set that I coloured using Copics. The foliage, also from the die set were similarly cut from white card and coloured with Copics, adding detail with a steady hand! A cluster of small white flowers complete my spray.
The sentiment is also Altenew, this time Extra Special. The original sentiment said sister but I managed to leave it un inked by using a Versamark pen and then heat embossed just the To the best with white EP on a black strip. When cool, I stamped the friend word from the same set in the gap instead.

OK, that's it from me but there's more Anything Goes inspiration over on the ATSM blog.


Joining in over at:-


It was the friends element that inspired me

Grab our logo
#504 Friends

Dapper Gent

Morning all.
It's another busy week here in the craftroom but that's just how I like it!
Anyway here is my card for you to announce the start of a new challenge over at Cardz4Guyz.
This time our theme is -

SOMETHING BEGINNING WITH THE LETTER T

Lots of things to get your teeth into there I think.
Here is my card using T is for Tie!


When I first saw the sketch at Less is More I immediately thought of a shirt and tie so away I went.


To create the 'tie', I used my Uniko Background Builders Christmas 2018 set, repeat stamping two of the strips across a panel of mid blue card in Blueprint Sketch DOx and Versa Colour white ink. I then trimmed it and turned the top 1/3rd 90' to create the knot effect. The white panels were cut to shape and added before being attached to an A6 top fold card.
My sentiment from HLS, Born to be Wild was stamped on a die cut banner and glued over the pinch point of my 'tie'. Voila a crisp white shirt and business tie, very dapper if I may say so!

So for more 'T' inspiration, check out the rest of the team here and then why not join us and prove making cards for guys isn't as difficult as you thought.

Joining in over at:-


CAS on Sunday
Birthday

Monday 28 January 2019

Uniko DT Spot

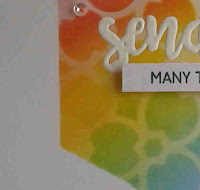
Morning peeps, just popping by to say I'm up on the Uniko blog with my DT inspiration spot using one of the fab uniko stencils.
Here's a  few sneaky peeks!


Tuesday 22 January 2019

STAMPlorations Love Hop and Linky Party

Afternoon folks.
Welcome to the STAMPlorations Love Hop and Linky Party.
Here is my card using one of Shery's fab digi downloads, details of which can be found on the blog.


After downloading my digi, I printed it off twice, colouring one with Copics the other shading the background with Prisma pencils. I fussy cut the Copic one and popped it up on foam pads over then base one, then added it to a 5 x 7 white base card.
The sentiment from Fond Expressions 2 was stamped below. Simples!

No photo description available.

All you have to do to take part for a chance to win over $100 worth of prizes including gift certificates and coupon codes, is download one of the digi stamps, link up your projects, and leave a comment as you hop along, what could be easier?
You don't have to display the graphic but you must link back to the STAMPlorations Love Hop and Linky Party blog post.
Commenting and linking up closes on Friday February 8th. Further details can be found on the STAMPlorations blog here.
So what are you waiting for?

Sunday 20 January 2019

GD at AAA

Good morning friends.
I'm posting early on this Sunday morning as the GD for AAA Cards. 
Here is my inspiration card for you.


The theme for the next two weeks is -


Well that is pretty self explanatory but don't forget to keep it CAS!

To start, I chose my Concord and 9th Blooms Fill in stamp and die set, then masked off the bottom two thirds of my A6 white base card with a large Post It note. I then stamped the background into the top third with black Momento ink, arranging it so that my flower spray was in the correct position!
On a scrap of white card, I stamped just one of the sparays, before die cutting it with the matching die. Before stamping in the fill in sections of the die cut, I replaced it in the negative shape to keep it from moving around in my MISTI. I also added a little bit of infill stamping to my panel, but leaving out some of the detail.
After laying on my extra posy, I decided the card needed some extra colour, so I added some green and white bakers twine under the popped up posy but no bow, just the texture of the 3 strands. A sentiment from LOTV, keeps it quite a versatile card, just write the sentiment you want on the inside!


For some more fab CAS inspiration, check out the rest of the girls here, then why not join us.

Joining in over at:-

City Crafter Challenge BlogOur blog badge
CAS                                     Dimensional Elements


Saturday 19 January 2019

A Bubble Chicks Twofer

Morning all.
Just nipping in to share a couple of cards I made for Darnell's Twofer challenge. 
I try to join in if I can but I always forget the closing date so I'm making sure I get them in on time this month.


I used my Stamping Bella Bubble Chicks again as the theme is birds and I could turn them into a cheeky set of robins again!
As I was trawling for inspiration for my non altered chicks, I saw a card that used the bubble stamps as a background panel and having just seen the CAS Mix Up challenge was Bokeh, which reminds me of bubbles, I decided to make a panel and then stamp the bubbles on to it. 
After stamping, colouring and fussy cutting the chicks, I stamped the other bubbles on the Bokeh panel but they were a little too pale so I added some white Prismacolor pencil to them.
The sentiment reminds me of my eldest Grandson, who always loved bubbles and got very giddy when we had them out!


I must admit that when I first bought this set I was suckered by the cuteness then couldn't think what to do with them! That was until I saw how to convert chicks into robins and penguins at a Copic colouring course last year. I've already made one card with robins and baubles so decided on another, with a couple more robins causing even more havoc!
The background was made by stamping a pine branch from a STAMPlorations set in Mowed Lawn DI and then painting over it with some water then stamping over with Pine Needles DI. The 'robins' were stamped and coloured, then I did a bit of mirror stamping to get a'robin' to face the other way, before fussy cutting birds and baubles and adding them to my card. The greeting is from an unbranded set I picked up at Port Sunlight a couple of years ago and strings were drawn with a fineliner and straight edge. A touch of Wink of Stella was added to the finished baubles for a little extra festiveness, which unfortunately doesn't really show up in the photo.


That's it from me then so have a great weekend, my Grandson's are coming soon so this will be the last bit of me time for a bit!

Joining in over at:-


Friday 18 January 2019

Uniko Challenge

Morning peeps. 
It's been a busy week on my blog and it isn't finished yet!
Today sees the start of a brand new challenge over at Uniko, so here is my inspiration card for you.


Bet you can't guess what the optional theme is this time ;) .


Yup, love is in the air at Uniko!
For my take, I started by sponging ink onto a top fold A6 base card with Worn Lipstick DOx through my Doodle Flower stencil, fading it out towards the edges.
On a scrap of card, I stamped the bud from Pure Florals- Rose and coloured it using Copics before fussy cutting it out.
I wanted a sentiment but couldn't find the exact one so I made one using a couple of the Simply Said Blocks and Blocks II and a little bit of masking.
The Rose bud was placed over the stencilling and the sentiment over the top on pads, simples.
Check out what the rest of the DT have made, then why not join in

Joining in over at:-


Thursday 17 January 2019

A simple stamped spray

Afternoon peeps.
I'm back to share a card for the new challenge at Seize the Birthday.
It's my second card for my spell as their surprize party guest, they've all made me very welcome.


You will notice that this card contains just stamping, no colouring as the new challenge theme is -

STAMPING ONLY

As I wasn't allowed to get my Copics or w/c brushes out, I chose the Wild Hibiscus set from Altenew which has these sketchy coloured layers that give the image an artsy look. While I was using Altenew's stamps, I thought I would also use their January colours too!
So taking a panel of white card, I stamped the outline flowers and leaves in Memento London Fog, then filled in with Tangelo and Morocco for the flowers and Altenew's Galactic Stream for the leaves.
I also used the Galactic Stream to stamp the sentiment from Altenew's Wishing You set, and trimmed the panel down and mounted it onto a dark teal card panel from my stash.

So how will you interpret the theme or perhaps you are not a toppings sort of person you're welcome just the same so long as it's a birthday project.

Joining in over at:-


Tuesday 15 January 2019

Just Sailing By

Evening peeps. 
Just popping by again to announce the start of a brand new challenge over at ATSM.
Here's my card for your inspiration for this week's theme of -

CAS


I used the sketch at AAA as my inspiration with the addition of the one at LIM.

I cut three strips of white card and then using a 1" circle punch, cut into each to make the waves. Once cut, inked them in DOx in Cracked Pistachio, Salty Ocean and Peacock Feathers adding some white gel pen to the crests and glued them together. On a scrap of white card, I stamped the MFT ship, used Copics to colour then fussy cutting it out and slipping it between the first two layers. To create a sense of movement I added a few suggested waves with the same gel pen. 
The sentiment was printed out using the computer and then the wave panel was trimmed down to size and added to the top half.
So that's that, but for more CAS inspiration and an explanation of what we are looking for check out the ATSM blog here.

Joining in over at:-


Brum, Brum

Good morning peeps.
The holidays are well past now and the girls at Cardz4Guyz are fully recharged and ready to bring you a brand new challenge. This time our theme is -

TRAINS, PLANES and/or AUTOMOBILES

I went with Automobiles for my card, which I made for the OH of my best friend.


I used a page from an old road atlas and a LOTV pre coloured image that she gave me a while back and thought was just the thing!
Using a 5 x 7 white base card, I took the map image and cut two rectangles, glueing them slightly off square after edging them with Vintage Photo DI. The image was fussy cut and added acros the map panels with sticky foam pads. On a couple of black die cut banners I stamped my greeting, part Christmas and part Birthday Sentiments from Uniko and heat embossed with white EP. All in all a very quick and simple card.
Must admit the panels look a bit wonky in this pic but I think it is an optical illusion as both panels were cut from the same panel and match up! Think the card is slightly bowed in the photo!

For more transport inspiration check out the rest of the team here, then why not join in?

I'm joining in over at:-


Cute and CAS

Saturday 12 January 2019

Uniko January Blog Hop

Good morning peeps.
It's the weekend so why not settle down with a cuppa and browse the Uniko DT's favourite stamps and stencils that have been released in 2018.
As usual leave a comment as you hop along for the chance to win, all the details are over on the Uniko site. You should have come from Jane's blog but don't worry all the links are at the end of this post.

Anyway without further ado here is my card using my favourite stamp set.


When I first saw the Pure Florals - Peony set, I just fell in love with this gorgeous blousy bloom.

Pure Florals: Peony £15 Clear Stamp Set

There have been lots of fab sets released in 2018 but although only released in December, this is going to be a firm favourite, I can tell. The large flower stamp just doesn't need anything else to make it shine, so I gave it the CAS treatment.

I used the colours from this month's Flower Challenge of pink and grey to create this 5 x 7 card.
To start, I tool a panel of grey Kaisercraft textured card in Smoke and stamped my layout with Versamark and fine white EP, masking where necessary. The large peony was then stamped on watercolour paper with Versamark and heat embossed with the same white EP. I then added some DI, Spun Sugar, Seedless Preserve and Picked Raspberry, on my craft mat to colour the petals in a w/c technique. The same technique for the leaves but using Pine Needles, Mowed Lawn and Peeled Paint and in the end I cut away all of them except the odd few. My flower center was a little bit of Mustard Seed and Wild Honey. 
When dry, I fussy cut it and put it to one side while I dealt with the base panel. It was trimmed to be slightly less than the white base card, then I added my sentiment from Wonderful Day, embossed with white EP. The large pink peony was then added over the embossed design with foam pads.

Wonderful Day £9 Clear Stamp Set

So what was your favourite release? Check out what the rest of the DT decided by clicking on the links below.

Jane 
Julie - That'll be me
Linda
I'm joining in over at:-


Take It, Make It ChallengePlease grab our logo
              AG                                  Fabulously Feminine

For your blog
Flowers

Tuesday 8 January 2019

Just a couple of Christmas cards

Hi, just popping by to share a couple of Christmas cards I made using the Uniko Snowflake stencil I used here, that fit with a few current challenges. I loved the pinky purple version but these use a more traditional colour scheme. I needed a few rather quickly for my craft class ladies but the colour and lack of embellishments makes them suitable for blokes too!


I used the same technique, a base colour then using a finger dauber to add the darker blues to the pattern before die cutting the letters from Altenew's Bold Alphabet dies and a few silver IO die cut snowflakes that were leftover from another project. 


The negative panel was laid over some sparkly silver glitter paper on a mid blue base card and the letters were popped up on foam die cuts and added to a midnight blue base card. 


I even had another panel of stencilled snowflakes left to make another couple of cards!

Joining in over at:-