Monday 25 June 2018

CAS(E) this Sketch meets Altenew

Good morning all.
The sun is beating down already so the curtains are closed to try to keep the house a little cooler, mind you the tiled floors and 18 inch thick walls help too!
The grass is cut in the field so hay making is on the way after last years paltry offering, it was the first year we hadn't made any, the grass was cut thrown out then baled and wrapped before the rain ruined it completely. 
Yesterday was just as hot and sunny as will the rest of the week and possibly next too, so I hid in the cool and had a play at midday! Here's the result.


A simple olc with a vellum banner greeting. My normal photo spot had too many harsh shadows for taking a pic so it was off outside to get one instead.

I used the layout at CAS(e) this Sketch and the colours at Altenew. The colours for the large Painted flowers was Memento, Elderberry, Sweet Plum and Lulu Lavender with the first outing for my Altenew cubes of Olive and Bamboo stamped onto a linen effect base card. The tiny blooms were coloured with Zig markers. I Stamped the sentiment onto a scrap of vellum from the bits box, then embossed with white EP before cutting with a die from MFT's Blueprints 27.

OK, that's about it for today, see you back soon.

Joining in over at:-


Saturday 23 June 2018

Uniko mini stencil launch

Morning all.
Hope you've had a good week and are ready for the weekend.
We are super excited here at Uniko to have a mini release of 3 brand new stencils.

Here are a few ideas I came up with whist playing with them!


This one uses the Bright Butterflies stencil and I started off by embossing with it in my BigShot, using ordinary white card and a tan mat. By embossing it I was able to see where to add my Flutter glue for the silver highlights and it gives a subtle texture to the rest of the panel! 
After adding the glue with a fine brush I waited for it to get sticky then added the silver gilding flakes. Rubbing away the excess, I added colour to the rest of the embossed butterflies using my Zig watercolour brushes. The sentiment from Uniko's Simply Said Blocks was stamped on black and embossed with silver EP. To put it all together, I first cut a panel from the embossed panel then to give a little extra shadow added a panel of black before adding to a white A6 base card.

My second card also uses the butterfly stencil.


This time I started by adding DOx in Peacock Feathers and Salty Ocean to a panel of white card and adding a few spritzes of water to create my background. When dry I went back in with the stencil and using a finger dauber and more DOx in Salty Ocean I inked in some of the smaller butterflies, moving the stencil around to give the effect I wanted.I stamped the sentiment from the Pure Florals -Daffodil set and embossed it with white EP and then die cut a large butterfly from the panel. I was going to just pop it up on some fun foam but decided to add some Blueprint sketch to the edges and some more Salty Ocean DOx and as the gilding flakes were still on the desk, added some to the edges of the wings after I'd inked it. My completed panel was mounted on textured silver card and then onto a 5 x 7 white base card. I have sent this to my daughter as it is her birthday today. She loves turquoise and butterflies!

Uniko Stencil Bright Butterflies £4.50
Copyright Uniko Ltd 2018

My next card uses the fab Mehndi Mandela stencil.


When I first saw this I just had to use some of my gold embossing paste and what better background than this fab purple. When the embossing paste was dry I added a simple sentiment panel stamped with part of the Just Because set embossed with gold EP.

Uniko Stencil Mehndi Mandala £4.50
Copyright Uniko Ltd 2018

The third stencil is Scattered Polka Hexagons, perfect for giving backgrounds a little bit of interest, as in this example.


 The background panel was made by inking white card with Candied Apple, Picked Raspberry and Worn Lipstick DOx. Then, with the stencil attached to the inked panel with some masking tape, I went over with a brand new baby wipe, pressing down through the hexagons. This removes some of the ink to create this soft background, the harder you press the more ink you remove.
I'd seen Jennifer McGuire use a partial die cut technique  on YouTube, but as my Uniko teammate Sarah P found out it isn't as easy as she makes it seem! However, after a bit of faffing around I think I ended up with an acceptable result. The rose die is from The Works and was partially cut from a panel of white card twice, leaving the strip in the middle which I stamped with the sentiment from Pure Florals -Cosmos. I die cut 4 more of the roses from scrap white card, stacked them together and glued them to the under side of the partial die cut panel. This was easier than repeating the difficult process of partial die cutting and a strip of foam tape supports the center strip.

This last card uses a technique I used here. It's quite a simple technique but effective I think.


To start I took a panel of bright pink card then attached the stencil with masking tape, then inked through with Brilliance white ink. After this layer was dry I replaced the stencil but moved it slightly to the SE of the panel and added Seedless Preserve DI. Where the ink hits the white it tones down the intensity so it appears that you have added a third colour!
My sentiment was made by layering 3 different embossing powders over a layered die cut word.
Using off cuts of the pink card I cut 3 words, stacking them together with glue. Then I inked the top with Versafine and added silver EP, then I inked again but this time added WOW Strawberry EP and finally I added Holographic EP. The effect wasn't as pink as I thought it would be but I still liked the overall effect. The birthday wishes, from the Birthday Sentiments set was stamped and embossed in white on black and a few gems complete. My trimmed panel was added to a plain white base card.


Uniko Stencil Scattered Polka Hexagons £4.50
Copyright Uniko Ltd 2018

So that's about it from me, however, as with any new release at Uniko there's a blog hop to celebrate and show you beautiful inspiration using the new products. We also have a wonderful, talented and all round lovely crafter joining us as our Guest Designer.... Ruth from Crafting While The Baby Naps. 

With all Uniko Blog Hops we have a GIVEAWAY too! Simply comment along the hop for your chance to win one of the three stencil designs being released and as there are 3 new designs, Bev will randomly pick 3 lucky winners!!
So what are you waiting for, get hopping!

                      Julie - that'll be me
Linda

I'm joining in over at:-

Stamping, embossing, stencil and die cuts

Take It, Make It Challenge

   
                                                                                               reds are WARM colours

   As You Like It Challenge
                   Favourite type of embossing - Horses for courses but dry embossing gives texture and allowed me to see where to add colour and gilding flakes

Tuesday 19 June 2018

A little birdie told me, it's your birthday!

Morning peeps.
Gosh the days are whizzing by and tomorrow is the longest day so it's all downhill from there towards Christmas, sorry but it had to be said ;)!
Anyway it's time for a new challenge at ATSM and here is my card for your inspiration.


Our theme this week is -


So any project that involves mark making, colouring, stamping or perhaps stencilling.

I've made this for a previous neighbour who is an Owls fan, no I didn't get the capital letter in there wrong, she is a footy fan and supports Sheffield Wednesday FC. For many years, since I moved away, I've made here an Owls themed birthday and Christmas cards in Wednesday's colours of blue and white. Yellow happens to be their away colour so I think I can get away with that too. So when I saw the theme at The Paper Players and the pic at The Card Concept, I thought I would get in early, lest I forget!
The stamps were magazine freebies, from different sets but I think work well together. The inside says It's your Birthday, Many Happy Returns.
The background of softly blended DI  Blueprint Sketch and Salty Ocean was laid down before the fussy cut owl was attached with foam pads. I coloured him using Copic markers.
OK, that's about it from me, please check out the rest of the team here and Make Your Mark with us this week.

Joining in over at:-


Masculine Happy Birthday

Morning all.
It's time for a brand new challenge over at Cardz4Guyz. This time our challenge for you is:-

METAL MADNESS

Hopefully that phrase will spark you into action and prove to yourself that making cards for men is not so difficult after all. Here is my inspiration for you.


I went with a faux metal background after seeing a video by Jennifer Mcguire, where does that fabulous lady come up with all her ideas? 
She explains the technique much better here but in essence I masked off a rectangle with painters tape then inked the space with Hickory Smoke DI and then added Perfect Pearls, buffing away the excess when dry. After carefully removing the tape, I embossed the panel with a DoCrafts cog EF and trimmed it down as the EF doesn't cover the whole panel. I added a die cut sentiment and some die cut cogs to finish. The panel was then mounted on pads on a mid grey base card.
Simples.
For more metal inspiration check out the rest of the team here.

I'm joining in over at:-

Grab our logo  
Use at least two dies                                                      

Simply Create Too Challenge Blog
For a male

Stinkin' Inkers Challenge Blog
The Guys Have it


Masculine 

Tuesday 12 June 2018

Happy 5th Birthday STAMPlorations

Woohoo, STAMPlorations is 5 years old and the STAMPgirls are celebrating the whole month long!
We are each sharing 3 of our favourite makes and asking you to CASE either our choices or the new cards inspired by them.
I had a really difficult time whittling it down to just 3 cards but here they are in date order!


I love this card and on my blog it is one of the cards that still attracts interest. Since it was posted in June 2015 there's been over 4500 visits to the original post. 
This Blooming Buds stamp by Dee is one of my fave sets, the cosmos style flowers go together so well and are a dream to colour, Copics in this instance. The 
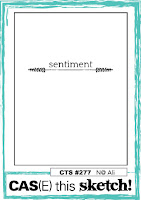
original design was for the sketch challenge, I do love a good sketch, which I've used quite a lot since as it's good to have a good layout in the bank for when the need arises!

My second card from 2016, uses another of my favourite stamps, the big and bold daisies from Bloom Sketches. In fact I think it was the first set I bought way back in 2014 as part of the STAMPclub membership.


For this card I went with a more artsy style, using masking fluid and Brusho/ Infusion ink crystals and a vellum wrap overlay. Again it is the result of a sketch challenge way back in July 2016, told you I liked a sketch!

Finally I've gone with a die cut design, love a good die cut too, and this is another popular card on my blog.


Originating back in  May 2017, it again was based on one of Shery's fab sketches. I combined some bold polka dot paper and citrous yellow highlights with the sentiment Celebrate and just one of the flower dies from Trendy Spring Blooms. The stamped sentiment is from the World Birthday Cakes set.
Now which one do I choose to CASE?

If you are not sure what we mean by CASE, then put simply -
Take inspiration from the layout, colour choices and/or stamps used and put your own spin on it.
I couldn't decide so I went with all three!


For this case I went with the same colour pallette and stamp set and a little bit of the layout (lots of white, a stamped and coloured panel and a strip of colour against the white.
This CASE uses the same Blooming Buds stamps as the original but the wavy edge was the CUTplorations Winter Landscape die, with the trees and house snipped off. The pink mount was the same but I trimmed the stitching off too before colouring it with Copics to match the blooms. The sentiment is from the Balloons and Banners set.

My second CASE went with the artsy element of the original as well as the same Bloom Sketches daisies.


To start I took a panel of  MM paper and stamped my flowers with Weathered wood DI and added some stems. Next, I took a paint brush and with some plain water painted around the flowers a little at a time, adding Sea Green Brusho crystals to the bottom and Prussian Blue to the top before the water dried. You have to add the Brusho before the water dries so that the magic will happen!
When the background was dry, I coloured the daisies using my Zig brushes, keeping two of the daisies soft and looser to suggest distance.
The sentiment was added once the panel was dried and trimmed down, CUTplorations Happy and birthday from the Balloons and Banners set embossed in white on black.

My last CASE uses the same black and white DP but another of the Trendy Spring Blooms dies and a yellow Fabulous word die cut but in a square format, 4 flowers instead of 3.


Just for a change, I went with a square card for this, cutting a panel of DP and then gluing it to a panel of white fun foam of the same size. When dry, I cut the blooms in a random pattern around the edge.
My panel was then attached to my white base card and the die cut flower outlines were replaced and glued in place. I cut some circle of white card a with a circle punch, coloured the centers with Copics and added to the flower centers. I did the same with the fabulous die and added the Hello and You, from Flowers and Frames, on panels of white card.

So here are my fave 3 and their CASES. What will you choose?


So I hope I have inspired you to CASE one of my cards, I'd love it if you did.

Don't forget you can get 20% off at the STAMPlorations shop by using my discount code -


I'd like to share over at:-


Please do grab our logo to display on your own blog 
                                             In the Garden

 Take It, Make It Challenge
 This daisy stamp dates from 2014                                                             

   
                                                 Inspired by the pink flowers and white icing on the cupcake

As You Like It Challenge
My favourite card shape is a simple A6 top fold, it's such an economical use of card, two per A4 sheet and no waste, and it suits my CAS style.

  Please grab our logo
AG


Unless Beechy is allowed instead of beachy, Beech being my surname!