Showing posts with label Let it Snow stencil. Show all posts

Wednesday, 17 April 2024

You're Going to Flip, Ink and Flip Snowflake Revisit

Good morning. 
Today the Uniko Brand Ambassadors are revisiting the Snowflake Ink and Flip stencil.
Here's my card using a mix of the ink n flip large snowflake stencil and the Let it Snow stencil.


For this weeks revisits and intro, I'm mainly focused on the technique Jennifer McGuire's daughter refers to as the magic reveal.
For this panel, I inked through the Let it Snow stencil onto a panel of white card with white pigment ink then when completely dry I used the Ink n Flip stencil to create a snowflake over the top. I used Salty Ocean DI with a light touch and magically the white snowflakes are revealed!
If you look very closely you can just about see the white snowflakes in the center.


For a change I cut the panel down to a square added it to my base card, added a strip of sparkly silver and a sentiment stamped in Memento Gray Flannel.

That's all for today but here are a few more ideas using the Ink n Flip Snowflake stencil.


Why not pop over to see what the rest of the team have been up to?


I'll be here same time tomorrow for another revisit and some more Flippin Fun!

Monday, 15 November 2021

Uniko BA Inspiration - Pastel Baubles

I'm over on the Uniko blog today with a little bit of festive BA inspiration with these two cards using the floating strip technique. 


You'll find all the details on the make there.

Monday, 20 September 2021

Uniko Brand Ambassador Inspiration

 Good morning folks, I'm over at Uniko with a bit of Brand Ambassador Inspiration!

Why not check it out? I even had a go at a small video of the spinning action.

Friday, 15 January 2021

Snowdrops

Good morning, time for a brand new challenge at Uniko.

Here's my inspiration for the latest challenge.


My starting point for this card was my stack of Gelli plate experiments. The background panel used here was cut from a larger piece made by taking a print after the first pull from a stencil overlay, using the Let it Snow stencil. The result is a ghostly, delicate effect that reminded me of frosty mornings like we had last weekend. I decided to use the Snowdrops from Spring Botanicals - Snowdrop, as they are the harbingers of spring and remind us that there is hope of spring after the dark winter days. Very appropriate at the moment I think. They are were also in my mind as I put the bins on the roadside the other day, as there are clumps of snowdrops at the side of the lane just waiting to burst into life.

I stamped the snowdrops and then masked them off before stamping a couple more stems, then used Copics to colour. After fussy cutting, I glued them onto my Gelli plate background and added a torn card snowdrift, allowing the two lowest blooms to hang over. A little bit of Wink of Stella added a bit of sparkle to the snow bank!


My completed panel was added with foam pads over a white linen A6 linen effect base card and a sentiment strip added below, leaving a thin shadow line between the two elements. The sentiment is from the Pure Florals Peony set.

Whilst I had the Snowdrop set out, I decided that I would make another in order to enter Darnell's Twofer Challenge and the Flower Challenge.
Here is what I came up with.


This time I went landscape and one layer for my watercolour interpretation.
No stencil this time but simple masking and heat embossing.
Using masking tape I masked off a border around a piece of mixed media paper and stamped the single spray of flowers with Versamark, then heat embossed with fine white EP.
At first I used a mixture of Chipped Sapphire and Blueprint Sketch for the background but it wasn't deep enough so I went over it with a deep blue Zig marker, blending out with water towards the edges.
The flowers were coloured with Zig markers and blended out with plain water before my sentiment was added and more fine white EP. The sentiment is from the same set as the snowdrops but I cut it up in order to get the placement just right. Carefully removing the masking tape gave the crisp white border. I thought the sentiment was perfect for anyone who needs a lift in these crazy times.


Not sure which one I prefer, they each have something to commend them I think.


OK, that's all from me, please check out the rest of the team and GD over at the Uniko blog, where you'll find all the Ts and Cs.

Joining in over at:-


Friday, 20 November 2020

Uniko Challenge

 Morning all, time for a new challenge at Uniko
Here's my take on this latest challenge.


Who doesn't like a bit of sparkle at Christmas?
To start this design, I took an A6 panel of light blue card and created the halo effect by ink blending with a selection of DIs. I used Tumbled Glass, Salty Ocean and Peacock Feathers, working in from the edge to the middle and back out again. Once dry I added some gold embossing paste through the Let it Snow stencil around the edges of the inked panel. 
The BELIEVE was cut from sparkly, gold, glitter paper using alphabet dies and glued flat to the center of the inking. The rest of the sentiment from Most Wonderful was stamped and embossed in gold EP.
I thought it needed a little bit more sparkle and dark contrast, so stamped some snowflakes from Snowflake Serenade  in Altenew's Teal Cave ink and heat embossed some with sparkly gold EP.
To complete, I trimmed the panel down to create a border and added it to an A6, white, side fold base card.
Here's another card I made using the same halo effect but this time I used shades of red DI, Festive Berries, Barn Door and Aged Mahogany on red card.


 Not as many snowflakes over the inking this time and one large holographic one for added sparkle. Recognise it? It's the large snowflake die with the points cut away! I thought it was a little too large for the effect I wanted. The small, stamped, snowflakes from Stunning Snowflakes were stamped with the Aged Mahogany, 1st and 2nd generation stamping.
My sentiment banner is from the Pure Florals - Poinsettia set, gold heat embossing on black, which I glued flat onto the gold snowflake and the popped the whole snowflake up on pads over the background.

For more seasonal inspiration check out the rest of the team here, then why not get your sparkle on and join in. If you aren't into sparkle then we'd still like to see your festive makes.

I'd like to join in over at:-

I chose red and gold

                                                          Christmas


Sunday, 8 December 2019

December Stencil Sunday

Good morning and its Stencil Sunday at Uniko.
It's my turn there this month to share some Uniko Christmas ideas.

Last year ,as part of the Christmas release, I made this card using unconvential colours and the Let it Snow Stencil, so I thought I would use the same layout and see what happens when you change up the colours and/or the stencil used. Here are my three takes using the same layout.


This card uses the In the Forest stencil and a trio of green inks from Altenew's Tropical Forest set.


This next card uses the new Winter Foliage stencil .


My third card is virtually the same card using the Let it Snow stencil, as last year, but this time in shades of blue.


For all the detais, check out the Uniko blog.

Happy crafting.

Saturday, 26 October 2019

Uniko Christmas Release Inspiration and Blog Hop

Morning all.
If you've been reading Bev's blog posts over the last week or so, you'll know that she has released a few brand new Christmas inspired stamps and also some dies, some to coordinate with existing stamp sets and some to stand alone. 
So as is tradition we are having a blog hop and giveaway, YAY!
So comment here before you hop along to the next stop for a chance to win and get some Christmas Uniko inspiration as you go. You know it's never too early to start those Christmas cards!
So grab a cuppa and settle in 'cos this is a long post!

My first card uses a stencil launched last year and a brand new large die cut snowflake. I spent many years looking for a large die so Bev has answered my prayers!


First I took a panel of white card and stencilled around the edge with Salty Ocean DOx and the 'Let it Snow' stencil. I started off pale and increased intensity as I went around. I also added a light colouring of the ink closer to the centre to take away the whiteness of the card. When dry the different layers give a sense of depth.
I trimmed the panel to just a shade smaller than an A6 base card and edged the cut edges with a little Salty Ocean DOx. Centring the die, I cut the snowflake but was careful to keep the small cut outs for replacing later. The inked and die cut panel was glued to an A6 white base card and then a blue fun foam snowflake was added back into the opening, adding back the small diamonds from the first die cut. The snowflake was then glued over the fun foam one, matching the pattern. My sentiment is from an older snowflake set,  Stunning Snowflakes, stamped in black onto a white panel.

My second card uses Background Blocks- Scandinavian Christmas and Winter Foliage stamps and matching dies.


To start I stamped the BB Scandinavian Christmas and heat embossed with white EP, then cut a circle  from it with a die. I inked this circle with Salty Ocean DOx, keeping the ink darker towards the edges. To darken the edges further, I added some Blueprint Sketch DOx to the very edge.
On a separate piece of white card, I stamped the evergreen bough from Winter Foliage twice in Altenew Olive, adding further contrasting green with my Zig pens before die cutting with the matching die.
From a scrap of matte silver card, I cut an ornament hanger and attached it to my inked circle, then threaded it with some silver chord and added a silver bow. 
I arranged the foliage branches in the top left of my base card, added my 'bauble' on pads and stamped a sentiment from Festive Sentiments in blue.

My third card uses the new Winter Foliage stencil and the gorgeous poinsettia from Season of Beauty.


For the background panel I used the trapped colour technique, inking through with Versamark onto a panel of W/C card inked with Antique Linen DI, embossing with clear EP then washing away the DI with a paper towel and water.
The poinsettia and leaves from Season of Beauty, were stamped then fussy cut with a few dots of glossy accents in the center, a banner sentiment completes. 

My next card uses Winter Foliage stamps and dies, the new Festive Sentiments Outlined as well as Christmas text from Season of Beauty and other festive sentiments.


Using my MISTI, I arranged the sentiments to cover an A6 panel before stamping on red card and embossing with clear EP. The white panel was cut using a border die before the foliage and sentiment were stamped. The pine cones from Festive Foliage were stamped and die cut and slipped under a wrap of jute twine. The white panel was then popped up on pads to complete.

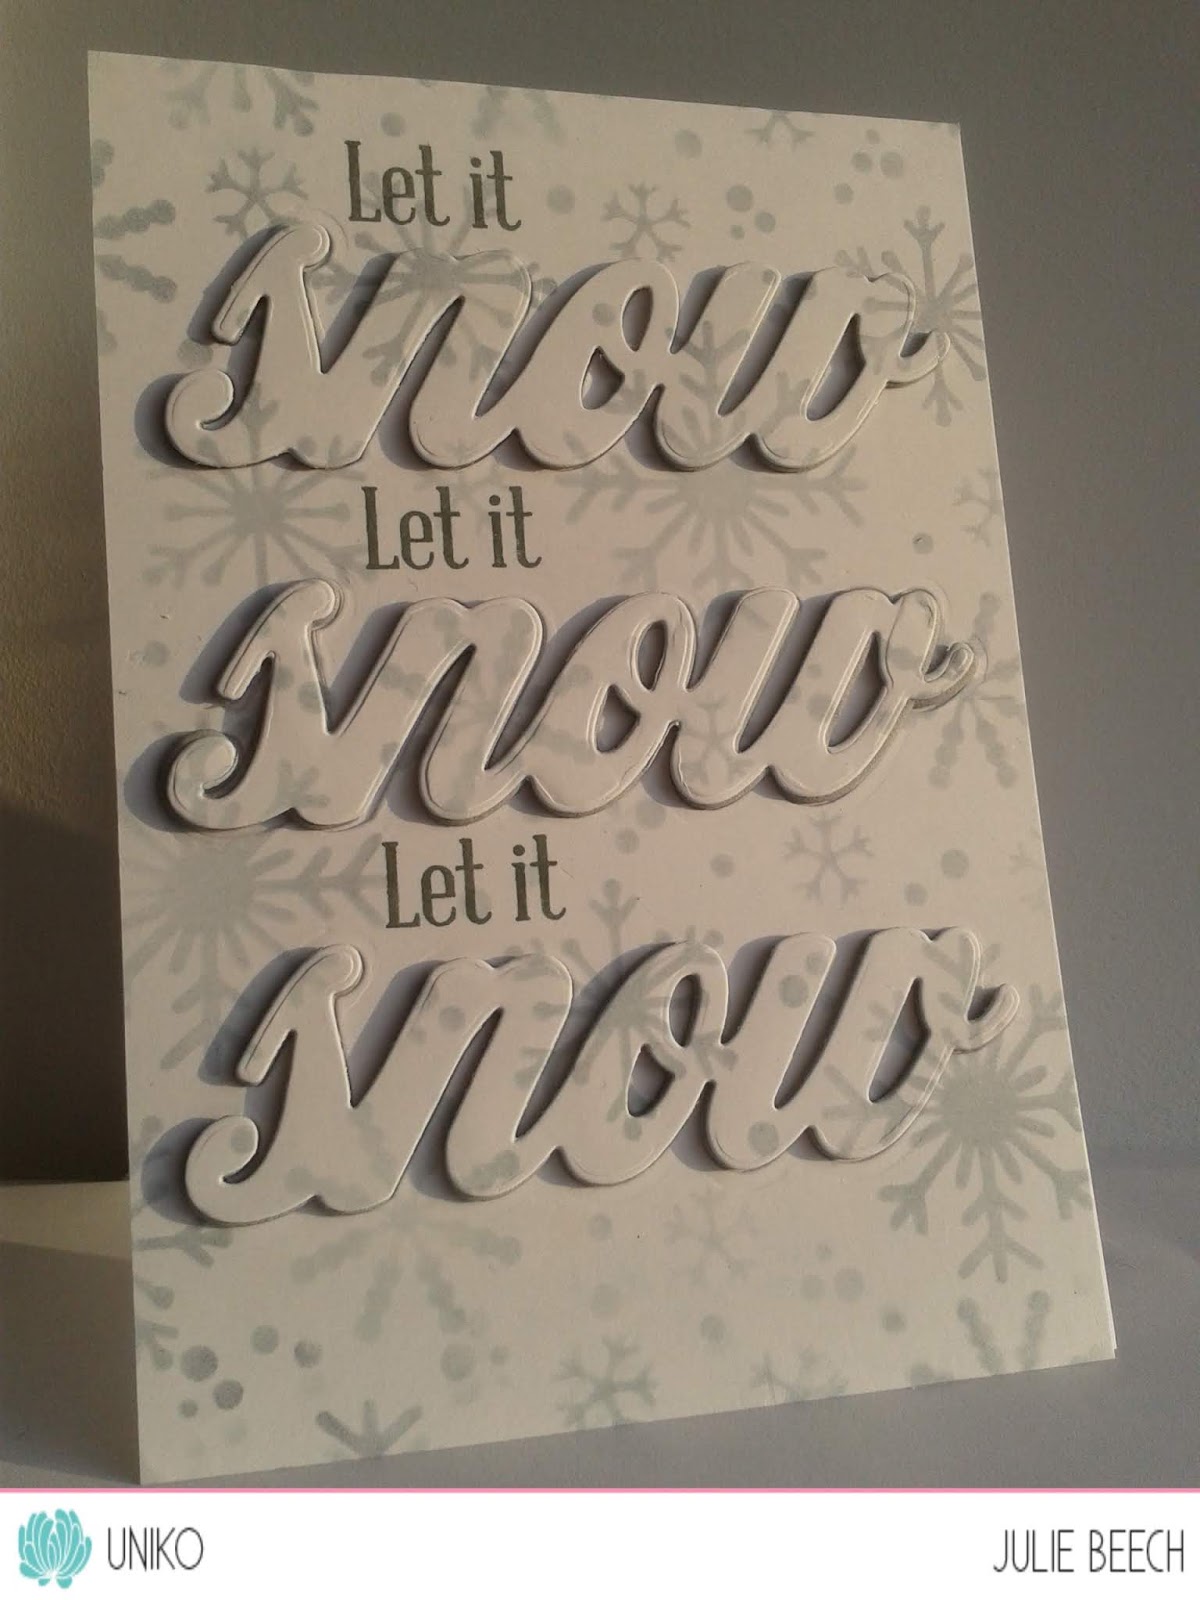
Finally, I've used the new dies Big n Bold Snow, with the Let it Snow stencil and Big n Bold Snow sentiment 'Let it'.


Using the stencil, I inked Weathered Wood DI with varying levels of intensity over a panel of white card, then cut three of the snow words from it, I used grey fun foam to cut three more snow words and stamped the Let it in dark grey ink. The main panel was glued to an A6 white card base, gluing the inked and foam words together but retaining the small inked bits to one side. The popped up words were glued in place and the retained bits popped flat into the appropriate spaces to complete the look.
And breathe, told you it was a long post!

Now you can check out the rest of the team's inspiration, but you may need to refresh that cuppa!
Julie  - that'll be me
Linda

Be sure to comment along the hop for your chance to win the ENTIRE Release! You have until Midnight GMT 2nd November 2019 to leave a comment and a winner will be announced shortly after.


Happy hopping!


  FestiveSentimentsPPMostWonderfulPP

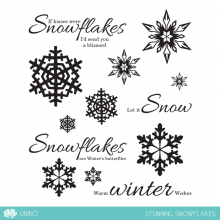
StunningSnowflakesPP

Tuesday, 11 December 2018

Uniko December Release

Good morning and welcome.
If you've been following the Uniko blog, you'll know that it's release day over there!
Three fab stamp sets AND two gorgeous stencils too.

Here are a few ideas for the new sets, so get a cuppa and settle in for a show.


This birthday card uses the latest addition to the Pure Florals range at Uniko. This time its a peony with additional script 'sending' and addition small sentiments.

Pure Florals: Peony £15 Clear Stamp Set

I started by stamping the large bloom and then a couple of the buds with Altenew Industrial Diamond ink, before colouring with Copics and fussy cutting. I wanted some texture for my base card so stamped some wood grain with a stamp from the stash and heat embossed with white EP. From some gold mirror card, I die cut a frame and arranged the blooms on the base card adding a gold embossed vellum sentiment strip.

My next two cards are made with the gorgeous Let it Snow stencil.


I used a selection of DI and DOxs to ink through it onto a panel of white card which I then used to form the main panel of the first card, then cut the letters for the second from the leftovers.
I chose a matching pink base card and added two thin strips of silver under the edges of the stenciled panel and added a die cut joy with a banner stamped using Simply Said Christmas on black and heat embossed with white EP. The die cut joy, from the Works, was cut from silver glitter paper and also from fun foam before being added to the base card. 
I used the bold alphabet die set from Altenew to cut the noel after I saw a card on You Tube by Therese Calvird. I love the contrast between the dark shimmery grey card base and the pink and white letters. A couple od die cut snowflakes that were sitting on my desk were added for accents.

Let It Snow Stencil £3.50

This fourth card uses the same stencil as well as the stunning Snowflake Serenade stamp set.


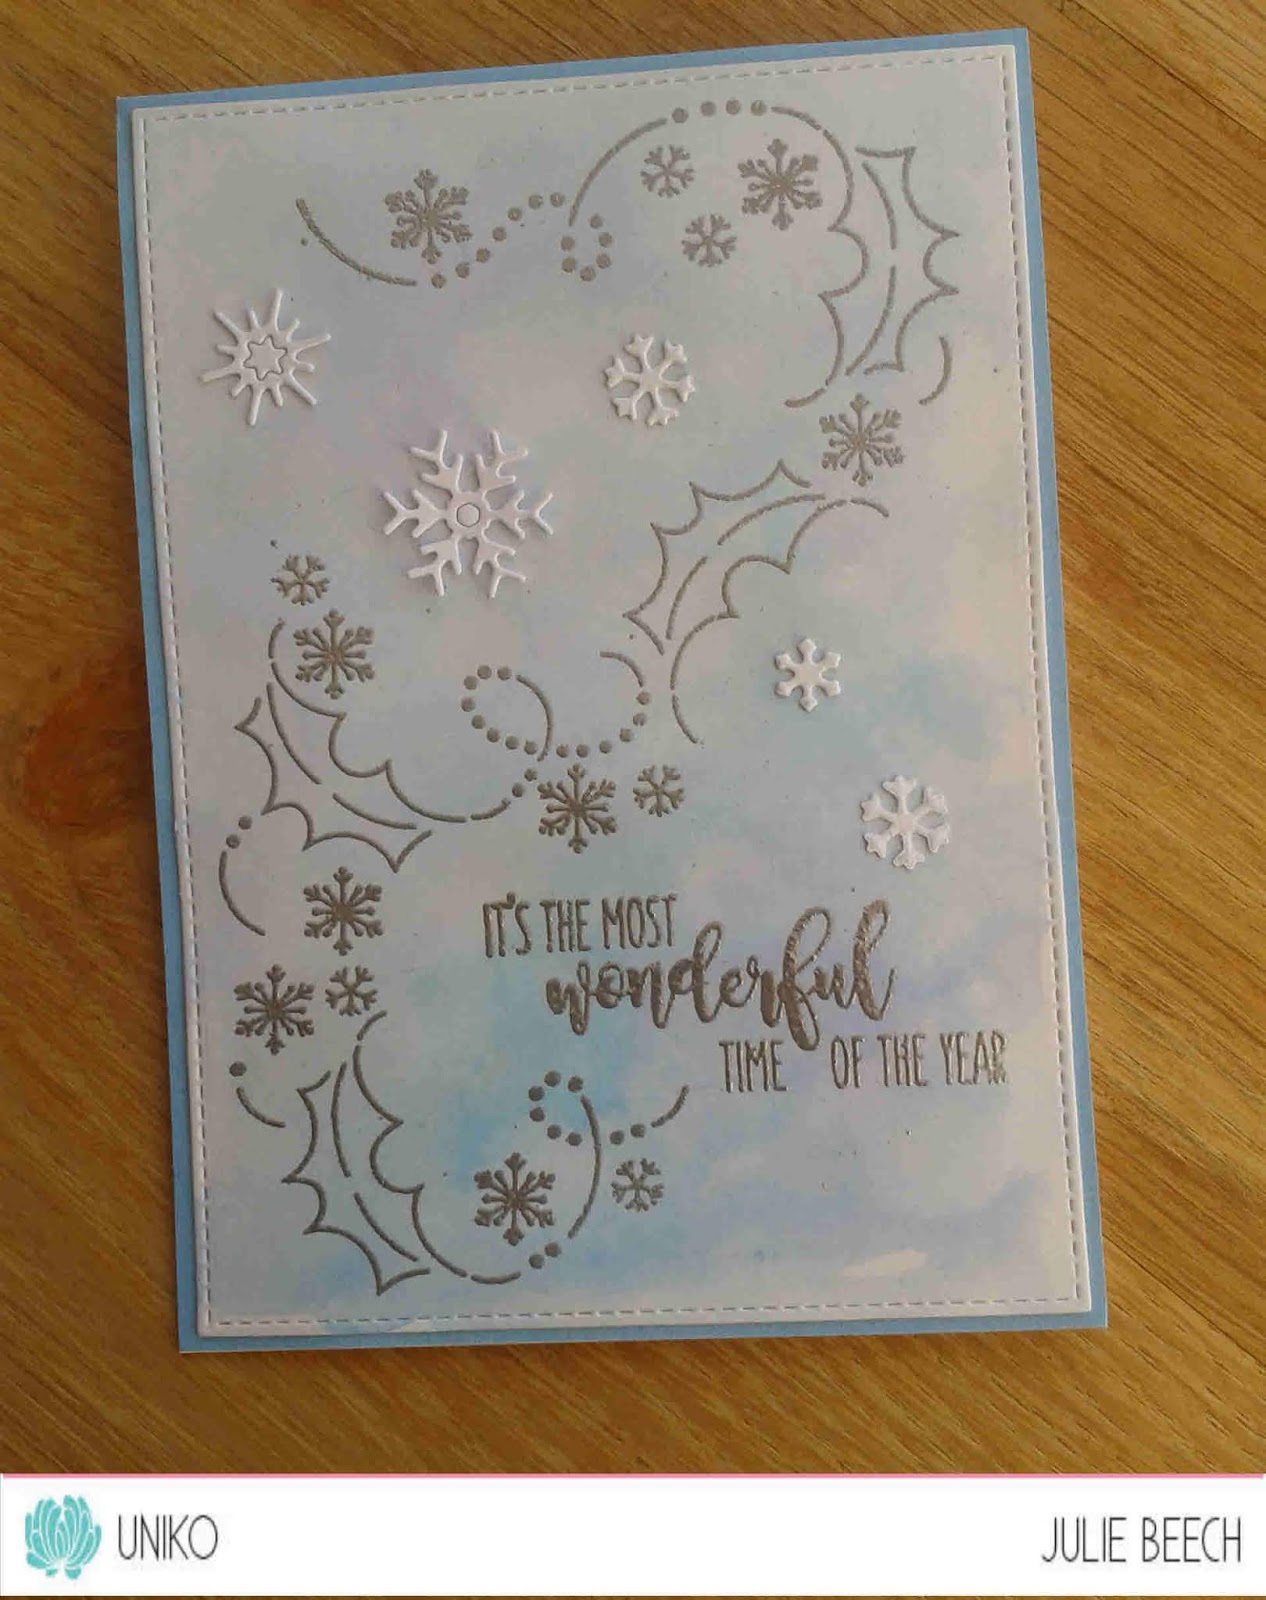
You can't really see the very subtle pattern of the stencil which I placed over a panel of dilute DI ink and left to dry, think I removed it too soon, but it worked with the delicate swirl of the holly leaves and snowflakes of the stamp which I simply embossed in silver over the top. Using a stitched rectangle die, I cut the panel down to size and mounted it on a pale blue card base. I added a few more of the die cut snowflakes from the stash and stamped and embossed the sentiment from the same set in matching silver EP.

Snowflake Serenade £9 Clear Stamp Set


Back to stencils for these next two cards, this time using the In the Forest stencil.


Again I inked a panel of white card through the stencil with an assortment of three green DOxs, Forest Moss, Twisted Citron and Mown Lawn but treated each half slightly differently.
The first half had the stencil replaced over it and Versamark inked over and then embossed with clear EP. Make sure you get a good coverage as when you add the blue DOx over the top, it will colour the green underneath! I found a previously die cut panel and placed the inked panel underneath, adding a white die cut Rudolph on foam with a red diamonte for his nose. The silver twinkle embossed sentiment  is from the Snowflake Sentiment set.
The second just adds a couple of die cut snowdrifts beneath the simply inked panel and a simple sentiment from Festive Sentiments.

In The Forest Stencil £3.50

My final card uses the Wonderful day stamp set, but only some of the tiny stamps!


I was still in need of a few more Christmas cards so decided to turn what is essentially a birthday stamp set into a Christmas one by using the berry style sprigs and laurel sprays.
I used the colours at The Paper Players and the layout at CAS(E) this sketch for my inspiration as after all these cards I was sorely in need!
I used some Altenew inks to stamp the foliage on a strip of white card and stamped and embossed with gold EP the Merry Christmas from the Festive Sentiments on a panel of red card.

                                                    
Wonderful Day £9 Clear Stamp Set

So that's it from me but there's tons more inspiration for you over on the rest of the DT's blogs.
Hop over and check them out, leave a comment and have the chance to win some Uniko goodies. 
All the details are on the Uniko blog.

Julie -that'll be me

Joining in over at:-


                                             free for all


                                              Greens


                                              Die cuts are my choice