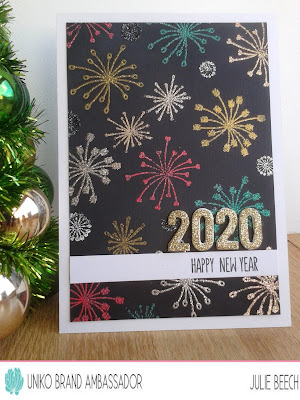
Tuesday 31 December 2019

Another simple Christmas card design

Morning all.
Hope you are well, well better than me as I struggle to shake off a bout of 'flu which started on Boxing Day! I don't think I've felt this rough for a very long time!
So rather than make a card through the sniffles, coughing fits and shivers, I 'm sharing a card I made awhile ago which fits the new challenge at Cardz4Guyz.

BLUE IS THE COLOUR


A simple blue base card with letters die cut from a scrap of stenciled card and mounted on fun foam and a couple of silver die cut snowflakes to finish.

For more inspiration check out the rest of the team here.

Saturday 28 December 2019

Brand Ambassador Inspiration at Uniko

Morning folks, I'm up over at the Uniko blog with another Brand Ambassador inspiration post and this card.


All the details can be found here.

I hope you've all had a fabulous Christmas and Santa brought youlots of crafting goodies. Hopefully this period between Christmas and New Year, one droll Radio 1 DJ naming it Twixtmas, is a quiet time and you get a chance to play with them!

Tuesday 24 December 2019

Merry Christmas

Just popping by before I forget to wish you all in blogland a very Merry Christmas by sharing this card with you.


I have two very excited Grandsons here at the moment who can't wait for presents around the tree tomorrow morning! 
Hope Santa brings you some fab crafting goodies.


Wednesday 18 December 2019

Yet Another One Layer Christmas Card

Good morning all.
I hope the weather is a bit better than it is here right now. It was foggy first thing and it hasn't really lifted.  There is a stiff breeze so walking the dog this morning was not particularly pleasant, cold, icy, foggy and breezy!

Just popping by to share a OL card I made for overseas posting, I always forget until I start to write them that OL is best for the purpose. It also fits with the new challenges at CASology and ATCAS.


I made a similar card a few Christmases ago and as I was in a rush to get it posted, I decided to CASE it!
I started by using a mask I'd made for this card  that I'd kept for just this event.
I stamped the branch from Altenew's Vintage Flowers, adding some extra twigs with a black fine liner. The lantern is the top of a lamp post stamp that I've had for years from Flowersoft, the bottom masked off and then stamped in black and coloured with Copics to create the hanging lantern. 
Using some Chipped Saphire and Blueprint sketch DI, I inked in the sky leaving a pale halo around the lantern, which I filled using Mustard Seed and Dried Marigold DI. To finish I added some snow to the sky, branches and lantern, with a gel pen, as my masking fluid had turned into a rubber ball in the bottle!
Removing the mask, I added the sentiment from Uniko, job done.

Joining in over at :-


Sunday 15 December 2019

STAMPlorations December Challenge, Joined in Yet?

Need some more holiday cards? Well there's still time to enter this month's challenges over at STAMPlorations.
Here's my card to inspire you.


No photo description available.

I like the look ofthe contrast between the white and the black on this card, it was inspired by a card I saw on Pinterest a few years ago.
I started by adding the Typographia Sentiment to the centre of a black A6 base card, embossing the top and bottom in silver and the central banner with white EP. Using the evergreen bough from Christmas Bell Medley, I stamped around the edge, first with white ink then with Versamark and white EP. Some Tonic Nuovo drops in red complete.

All the details you need to enter are to be found here.

Saturday 14 December 2019

PAS CAS - Celebrate

Evening all.
Hope you're well on the way to having all your Christmas prep done but if you have a little time over the next few weeks why not join in our brand new challenge at Perfectly CAS.
Can you guess the theme from my card?


What did you guess? The actual theme is -


Did you get it right?

I used some strip stamps from Uniko's Background Builders Christmas and Christmas 2018 to make a panel of card from which I die cut theses letters.
The red base panel was first stamped tone on tone with red, then dark green and finally Versamark and white EP. I added a few gold lines with a pen and ruler. Last year I made a card from a panel made in a similar way so you can see what the original panel looked like here.
When I had die cut the letters using an Altenew's alphabet set, I added them to an off-white base card, adding the stamped Uniko greeting in black. I kept the die cut happy to the middle third of the card this time to ensure it was a CAS design!
For more celebration inspiration, check out the rest of the team here.

We're Having a Christmas Party @ Uniko!

Good morning folks.
Over at Uniko we are having a bit of a party for all our Uniko friends.
All you have to do is create a Christmas project, anything goes, using your Uniko goodies and link it up! 
Join in the party & share your Christmas cards, tags, projects or scrapbook pages using Uniko Clear Stamps, Stencils or Designer Dies. See the Party Rules at the end of the post to be eligible to win one of the three prizes on offer.

How about an incentive to join in & some PRIZES!

First Prize £25 eGift Certificate

Second & Third Prize Winners Choice of £10 In-Stock Clear Stamp Set
Simples.

Here is my card using the poinsettia outline from the Season of Beauty stamp set and Background Builders Christmas set.


I used the layout from a card I made last month at a craft class in N Wales with Lydia from Altenew.
I love watercolouring but struggle to use it loosely enough, so really had to just go with this colouring!
On a panel of Mixed Media paper, I stamped the outlines and leaves with Altenew Black ink and left it to dry thoroughly. Taking each sepal or leaf at a time, I added some clean water with a medium brush before adding slightly watered down Altenew ink, first Heartbeat, then Vineyard Berry to the base of the sepal or leaf. The water takes the ink and blends it for you. Don't be too precise adding the clear water as the white patches liven up the image. By the way I say sepal as the flowers of a poinsettia are actually the tiny insignificant yellow centers! I used Altenew's Forest Glades and Evergreen ink for the leaves.
If you need to go back in to deepen the colour, add some water first to the while leaf or sepal so you don't end up with hard edges.
When completely dry, I added some splatters of gold and a sentiment strip, a narrow strip of gold glitter paper under the sentiment completes.
So that's me done, but if you would like to join in check out the rules below.


Party Rules

* The party is open to everyone, everywhere in the world
* Anything Christmas Goes (Cards, Tags, Projects, Scrapbook Layouts Etc)
* Your entry MUST include at least ONE Uniko product (clear stamp, stencil, designer die or digital freebie) as the MAIN focus of your entry.
* Join in as many times as you like, as long as your entry ticks the rule above!
* Link Up will CLOSE on 8pm 31st December 2019
*WINNERS will be announced 6th January 2020
*The first prize winner will be chosen from a vote by the Uniko Brand Ambassadors and the last two winners will be chosen randomly from all the entries that have adhered to the rules.


Most of all have FUN!

I'm linking up over at:-


    Take It, Make It Challenge

Penny Black and More
Flowers

Friday 13 December 2019

CASeing Sarah

Morning all.
Just popping by to share this card I made using LOTV's penguin Trio.


I was inspired to make this for my daughter and SiL for Christmas after seeing this card by my bloggy friend Sarah over at As you like it.
Here is her card


I do have the same little penguin as she used but decided to use the trio as it reminded me of my daughter, SiL and two gorgeous grandsons! As I've mentioned before, my SiL loves penguins!
Using Copics, I coloured the penguins and the scarves to match the football clubs they support, Sheffield Wednesday and Liverpool before fussy cutting and popping them through the holes. My spotty DP is more like snow than polka dots but I think the overall effect is the same. For once, my card isn't a CAS as Sarah's, as I embossed the top peekaboo panel with a snow EF before adding it to the card. The cloud and peekaboo windows were cut with an MFT die, a white die cut sentiment from STAMPlorations completes.


Joining in over at:-

As You Like It Challenge

CASE your favourite DT card (& say why)


The Cutie Pie Challenge Blog
Christmas Cuties

Sunday 8 December 2019

December Stencil Sunday

Good morning and its Stencil Sunday at Uniko.
It's my turn there this month to share some Uniko Christmas ideas.

Last year ,as part of the Christmas release, I made this card using unconvential colours and the Let it Snow Stencil, so I thought I would use the same layout and see what happens when you change up the colours and/or the stencil used. Here are my three takes using the same layout.


This card uses the In the Forest stencil and a trio of green inks from Altenew's Tropical Forest set.


This next card uses the new Winter Foliage stencil .


My third card is virtually the same card using the Let it Snow stencil, as last year, but this time in shades of blue.


For all the detais, check out the Uniko blog.

Happy crafting.

Tuesday 3 December 2019

The Walrus, Polar Bear and Penguin

Good morning folks.
I hope you are feeling better than I feel today as I'm into my second week of a shocking cold!
I should be meeting up today with a fellow crafter I met at the Altenew North Wales meet up, but I had to cancel as I wouldn't want to pass on this lurge! The fridge is rather empty despite the OH popping out last week for a few odds and sods but at least the freezer is still supplying meals, if I remember to take them out the night before that is!
Anyway its a good job I got ahead with my Christmas crafting as it's time for my inspiration for this times Cardz4Guyz challenge -

CHRISTMAS CRITTERS

I saw a card on the StampingBella FB page which reminded me that I still hadn't used the snowflake circle die cut my bloggy pal Sarah sent me a couple of Christmases ago so came up with this card.


The die cut is a lovely shimmer pearl card but I needed to mount it on a panel of blue as it clashed with the white, there was enough of the waste that Sarah thoughtfully also enclosed, to die cut some extra snowflakes to add to the blue textured panel. 
The scene in the opening was made using a STAMPlorations landscape die cut and a scrap of NitWits DP.
The cute Christmas Critters from StampingBella, were coloured with Copics, fussy cut and added to the card. Sentiment from Uniko stamped in blac completes.
So for more critter inspiration check out the rest of the team here, then why not join us in the gallery Linkup.

I'm joining in over at:-


Monday 2 December 2019

Penguin Fishing for Snowflakes

Evening folks.
It's time for a brand new challenge over at HLS CAS. Here's my inspiration for you.


Must admit that the theme from Frozen the movie ran through my brain when I read the theme prompt, but in the end I chose this cute penguin fishing from HobbyHouse crafts.
I loved the idea of him bashing a hole in the ice to go fishing and ending up with a snowflake on the line!
Fussy cutting him after colouring with Copics, I added a die cut snowflake instead of the one from the image, it made cutting out so much easier!
There were a few snowdrifts in the original image too but they didn't fit the design, so I added some die cut ones of my own, adding depth with a dash of Copic colour and some Wink of Stella.
The sentiment is from Uniko's Festive Sentiments.

For more freezing inspiration please check out the rest of the team here.

I'm joining in over at:-


Sunday 1 December 2019

December Theme and Photo Inspiration Challenge at STAMPlorations

Good morning.
Have you made all your Christmas cards yet? Well if you are looking for some ideas the new challenge at STAMPlorations Theme/Photo prompt may help. Here is my take on this month's prompt.


No photo description available.

As you can see, I went with the theme and the colours from the photo.

I used a die cut Christmas Icons Christmas Tree#1 which I paper pieced with DP before adding to a black panel die cut using the smallest of the Crazy double stitched rectangles. I used some of the same red glitter paper I used for the pot to create a thin border to my panel and added the completed panel to an off white A6 base card. The sentiment, from Trendy Christmas Trees, was stamped and embossed in black sparkly EP. A punched star completes my tree.
Overal a very quick and easy card to make. If you cut a tree from each DP you would have 7 other trees to make a card with!

So why not pop over to the STAMPlorations blog for some more holiday inspiration and then why not enter your make into the gallery? All the Ts and Cs are there too.

Thursday 28 November 2019

BA @ Uniko

Hi, I'm up over at Uniko with a little bit of Christmas card inspiration.
For details on how I made these cards check out the Uniko blog here.


Tuesday 19 November 2019

Altenew Plentiful Pine

Morning all.
It's time for a brand new challenge over at Cardz4Guyz. This time our theme, very appropriately is -

ICY COLD

So, perhaps another chance to use the theme to make more Christmas cards like me?


The other weekend, I treated myself to a crafty day with Altenew's Lydia Evans over in N Wales.
We made a batch of cards and had a great time chating with like minded crafters, old friends and new.
We used a couple of the new November release from Altenew, including Plentiful Pine. Like many of their stamp sets it is a layering one but as in this card it doesn't mean you need to use all the layers!
As it is a OL card, so a bit of planning was required before I started stamping.
I first created a window mask and then added a strip of torn post it tape across the opening and added a die cut circle mask too. I carefully added some Faded Jeans DI across the top of the window and then stamped the second layer of one of the small trees in black whilst the mask was still inplace. 
Carefully removing the torn mask, I moved it down the opening and added some more of the Faded Jeans DI to create another snow drift. Before stamping my foreground trees, I removed the circle mask and stamped over the torn mask with the second layer of the tree in Altenew's Evergreen ink three times. I then over stamped each of these with the third layer and black ink.
A little bit of Weathered Wood DI was added to the moon and across the snow to create some suggested shadow. 
Removing the window mask, I stamped the sentiment from the same set in black and added some stars to the sky with a white gel pen.

Over at Twofer, the wonderful Darnell and her DT are asking for Winter Foliage themed cards, so as I still had my stash out, I made another OLC but this time I used the whole card front.


I used the same torn tape masking principle but this time I used Salty Ocean DI to create the sky and to stamp the background trees. An extra snowdrift was added and the large pine tree was stamped in all its glory using Altenew's Green Fields and black ink set. We discussed using white EP for the final layer on the Saturday but I didn't use it this time, I may in future designs. I did think that the base green was a little too pale on the large tree, so added another base layer with a light inking of the Salty Ocean. The sentiment completes.


Two rather Icy Cold scenes I think!

For more Icy inspiration please check out the rest of the DT here, then why not have a go?

I'm joining in over at:-


CAS on Sunday
Use a Frame

Friday 15 November 2019

Have you joined in yet?

Just popping around to remind you that there is still time for you to enter the STAMPlorations challenges.
As we are getting near to the festive season, I've kept to the Christmas theme with my card inspiration.


The Theme and Photo prompt challenge inspired me, focusing in on the theme element of stamps and circles.

No photo description available.

I've used this technique before but using a group of baubles, but this time I went with just the one circular aperture but two cards!
Using my MISTI, I stamped and embossed the STAMPlorations Merry Little Christmas Typography sentiment, twice with gold on red and once with red on white, onto panel cut with the middle sized Crazy Double stitched rectangle die. Using a MISTI ensures that the stamping is exactly in the same position so I can swap around the different elements easily.

To create the bauble effect, I took one of the red panels and die cut a circle. Setting the red rectangle to one side, I took the red die cut circle and added some Memento Rhubarb Stalk ink to the edges to give it a bit of dimension before adding some foam pads to the back. I added a gold chord to the white panel and then popped the red circle over, matching the writing. The finished panel was then also popped up over a base card from the same white card. A bow from the same gold chord completes.
For the red card, I laid the die cut panel over the other red embossed one and marked the edge of the opening lightly with a pencil. With the same red ink as before, I inked the bottom uncut layer to create dimension and the popped the die cut one over the top with foam pads. Some more of the gold chord was used to create the hanger and bow before the panels were glued to a matching red base card. 
OK, so for more STAMPlorations inspiration check out the teams here.