Tuesday, 23 August 2022

Stencil bugs

Good morning card makers, time for a new challenge at Cardz4Guyz.
For this latest challenge we would like to see your masculine cards that -

USE A STENCIL

Here's my take using a STAMPlorations Art Splatters stencil, a die cut happy birthday and some freehand doodling!


My inspiration was a card I'd seen using splatter images with facial features. I loved how the feature stamps turned the splats into funky creatures, sadly I can't find the link again to share.

Anyway, on a panel of white card, I inked through the various splatters with DOx in a variety of colours, Salty Ocean, Twisted Citron, Cracked Pistachio and Wilted Violet. Once dry, I added a variety of eye and mouth designs to create my critters. I even added a few antennae to the green ones which reminded me of caterpillars! A few dots of white gel pen were added for extra interest.
My sentiment was cut 3 times from black card and stacked before adding to the panel, simples!
There are so many different stencils out there for you to use and the DT have some super ideas if you need it, so why not join in this time?
Check out the DT here for more masculine card ideas.

Joining in over at:-

No topping this time!

Monday, 22 August 2022

Uniko BA Inspiration

 Afternoon crafters, I'm sharing a couple of cards I made for a BA post over at Uniko using the Winter Foliage stamp, die and stencil together with the Christmas Wishes stamp set.

I was inspired by the latest challenge at CAS Christmas Card Challenge where their cue word is PINE, hence the use of Winter Foliage!

Here are the two cards I created, full details are over on the Uniko blog.


Joining in over at:-


Tuesday, 16 August 2022

Color Hues #47

 Good afternoon, it's the middle of the month so it's time for a new colour combination at Color Hues.

Here's my take, CASEing one of my own cards here.

Mmm, those colours conjure up mint choc chip ice cream for me, nothing nicer on a hot day and we've had plenty of those recently here in the UK! I was going to go down that route then went off it and decided on butterflies. The sun has been ideal for butterflies, but not for us humans, there have been loads fluttering in the tall grasses and landing on the flowers, painted ladies, gatekeepers, tortoiseshells, peacocks, commas and some huge red admirals amongst others. Some are showy and some, like mine, are a dull brown.

I made my own background for the panel background using the faux mother of pearl technique, using a satin paint to resist the ink, leaving a shimmery effect.

On a panel of white card, I added some white pearl paper effects with a piece of scrunched up snappy wrap. After leaving it to dry, the panel was inked with Altenew's Minty Mint and Sweet Leaf ink. Putting to one side, I cut a frame and some leaf sprigs from white card, then glued the sprigs to fill the frame. The inked panel was then added behind. 

From a scrap of dark brown card, I cut out some butterflies and added them to the panel. The large MB butterfly has a lacey companion which I cut out from some shimmery brown card and added over the top. On an off cut of matching card, I stamped the sentiment in Memento Rich Cocoa. and slipped it under the panel then added it to an A6 base card.

So where will these new colours take you? We'd love to see your takes in the Color Hues gallery. There's plenty more inspiration from the rest of the team over at Color Hues!

Joining in over at:-


Sunday, 14 August 2022

Faux Batik

Evening all, time for a new challenge at Perfectly CAS.
Here's my take on the new cue word, inspired by the challenge at CAS Mix Up.


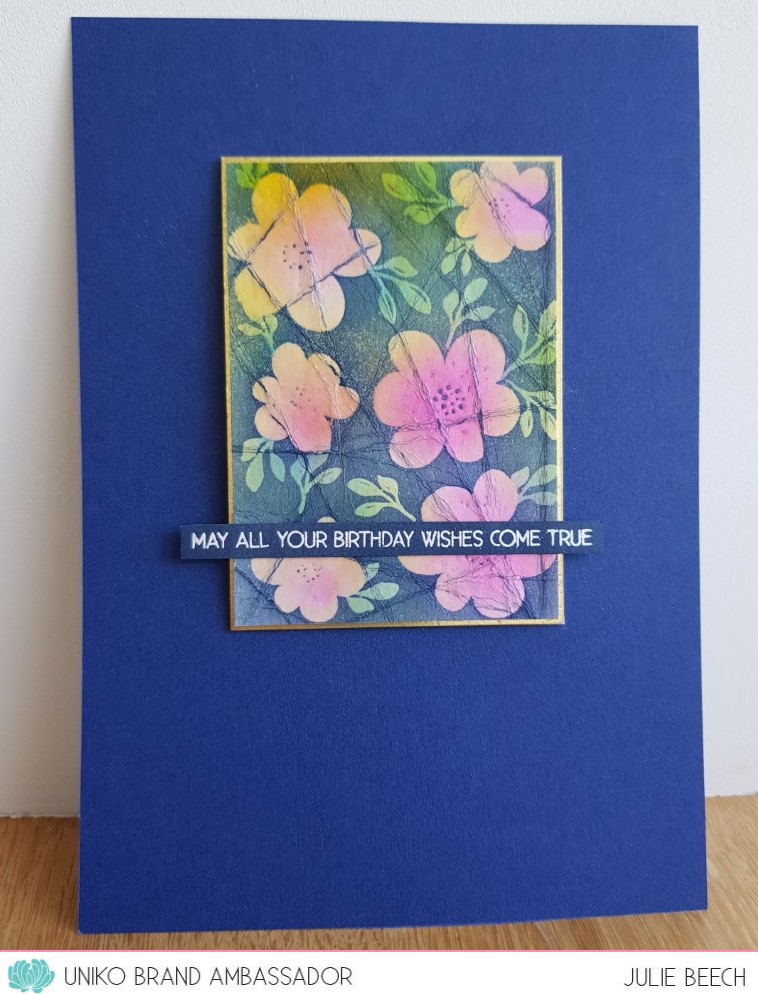
There are obviously two ways to emboss, dry and heat, I chose the heat route and a new to me technique called faux batik. My friend Loll introduced me to the technique, thank you it was fun to do!

To start, I added DI ink in Picked Raspberry and Mustard Seed to some MM paper, not paying much attention to the blending. I used the stamp I wanted to use as a guide as to where to place the colours, then stamped the flower stamp of the Uniko BB Doodle Flower set with Versamark and heat embossed using clear EP. Before I added the leaf stamp, I added some Salty Ocean DI where the leaves would be and repeated the embossing with the leaf stamp. Once I had completed that part, I started to distress the panel by folding the paper. This cracks the embossing as well as the paper to leave lines in the design which when coloured with more ink show up. For this layer I chose to use Chipped Sapphire. All excess ink was rubbed off with a soft cloth before I trimmed the panel down and mounting it on a panel of gold card. The sentiment from Uniko's Pure Florals-Cosmos, was stamped on a scrap of blue card to match the base card and heat embossed with white EP.
The finished panel was attached to the blue base card with foam pads. I had firstly added it to an A6 note card but on second looks, I decided it was not CAS enough, so simply upped the size to a 5 x 7inch and the CASness was just right!
So how will you interpret the cue card, we'd love to see your takes in the gallery this month.
As always there is plenty of inspiration from the rest of the team over at Perfectly CAS!

Joining in over at:-

I used sponging and folding as my extra MM elements

Tuesday, 9 August 2022

Grunge meets CAS

Good morning, time for a new challenge at Cardz4Guyz. This time we would like you to:-

GET A LITTLE DIRTY

In other words, include a distressed or grunge element in your project. Here's my take, though I couldn't go completely grunge!

I used a couple of Uniko Background Blocks, Cogs and Splatter to create the inner panel. Stamping the cogs with Versamark on cream card and embossing with WOW Brass EP. The Splat was then stamped over the top in Vintage Photo DI and the excess blended over the rest of the panel to soften the contrast.

My top panel of pale cream card was torn to make an aperture and leave the raggy edges showing. then my inked panel was slipped underneath. A few gold, die cut cogs from my stash and a sentiment stamped in Memento Rich Cocoa complete the panel which was then added to a matching A6 note card.

So how will you express your inner grunge? If you need some inspiration there's plenty over on the Cardz4Guyz blog.

Joining in over at:-

AG with option to create your own background