Showing posts with label Mid Century Modern Purrfect Day. Show all posts

Friday, 13 January 2023

Release Day, Blog Hop and Giveaway

Good morning. It's release day at Uniko and we are giving you the chance to win the whole release in our blog hop. Just leave a comment as you hop along to win, simples!! The stamps and stencil are also available to purchase here.

My first card using the new release, combines Mid Century Modern Frames and Purrfect for this 50's inspired card.


The largest of the frames was stamped followed by the cat outline. I didn't need to mask it off as I was going to colour it with black Copic. I also stamped a few of the small atomic elements in black. The sentiment is from the frames set too.

Keeping with the cat set, I created this fun card.


I used a Sizzix plate die for the circular openings as well as a couple more made using a punch. The solid cat was stamped in various directions with Memento Tuxedo Black onto the largest 7 circles, adding the features with clear EP and white gel pen. The smaller circles were placed back into the panel and secured at the back with tape, the stamped ones placed in and similarly secured before adding to a white base card. A sentiment combining the Mid Century modern Frames and Purrfect sets completes.

My next card is very simple and uses the BB Mid Century Linear Lines stamp.


I simply stamped and embossed the lines a few times in my MISTI to build up the dimension then added the sentiment, So Much, with Jewelled Gold EP and fussy cut. The finished panel was added to a matching base card on pads.

Now do you remember my stencil panel card from yesterday? Well here is the other half in another masculine birthday card.


I simply trimmed the leftover panel down, cut it into two and popped both pieces up on pads onto an A6 base card with the sentiment from Floral Vines stamped in black in the gap. It was a bit of a faff to get all the different colours inked onto the panel so I'm pleased I managed to make two cards from the one panel!

So what do you think? I know I've had fun playing with the new release and I know the rest of the girls have had a fun time playing too. For the chance to win the full release hop along to leave some love as Bev will be drawing one lucky commenter from blogs and social media to win.

Julie - that's me

So don't forget to leave a comment here before you hop along, Bev will draw the winners on Saturday 21st January.
Happy hopping!

Thursday, 12 January 2023

Introducing ... Mid Century Modern Purrfect Day and MOD Background Builder Circles

Morning and welcome to day 3 of the latest release from Uniko. Today sees us focusing on a cute new stamp set, Mid Century Modern Purrfect Day. Here's my take using the cute puss cats.


When I first saw the set I wanted to use the cats to create a heart shape with their tails, but as they weren't a mirror image of each other I had to sit and have a think.
I ended up using the mirror stamping technique for one of the cats, stamping the outline one onto the back of a larger stamp, any Background Block stamp is perfect for this, before stamping it off onto the paper. I coloured the cats with Copic marker and fussy cut, by fussy cutting them I was able to make a more heart shaped shape with their linked tails! After I'd done all this, I realised that if I had just cut the second outline out and coloured the wrong side of the cat, it would have worked just as well! 

A panel of white card was inked with Chipped Sapphire DI, keeping it light where I was going to place my die cut moon. The moon is simply a die cut circle with a light inking of Weathered Wood DI. the moon was added to the inked panel and the two cats added, I did cut off the very bottom of each cat that over hung the panel before adding it on pads to the A6 base card to which I'd already stamped the word Purrfect. A few tiny silver gems to one of the cats completes.

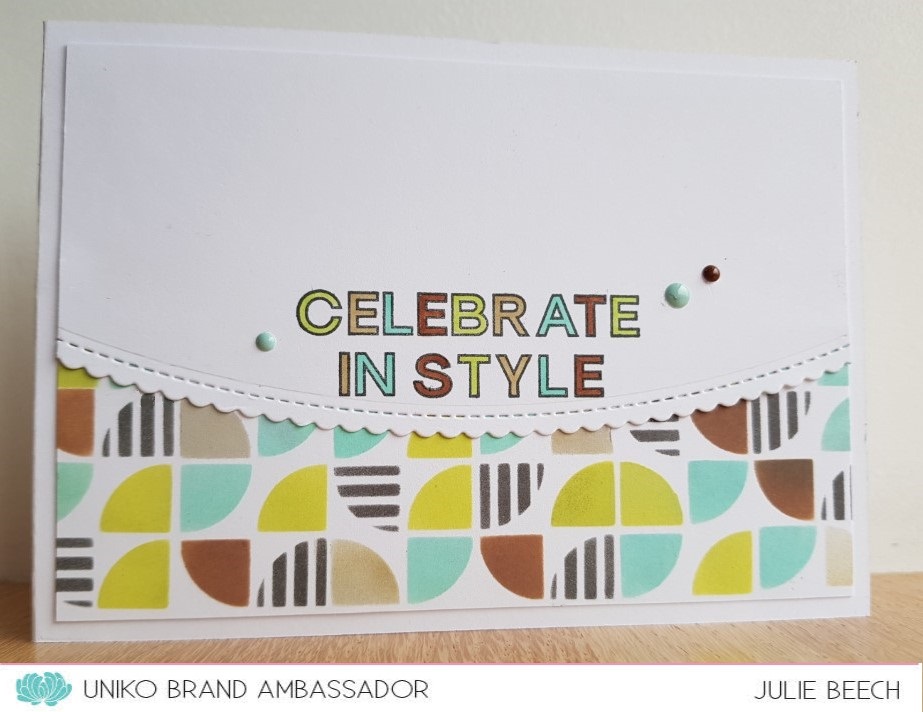
Now to the stencil, MOD Background Builder Circles. Still keeping with the retro theme this can be used to create a whole panel of pattern or just a small area, it's all down to you! Here's what I made with half an A6 panel I created.


I chose the colours after seeing them as wall art on Pinterest. I would never have thought to use them but I really like how they go together. I used a mix of DOx and Altenew inks, masking off as I went. Each shape was given it's own colour to make my life easier but can you spot where I got it wrong?
The finished panel was added to a base card and the scalloped edged panel, stamped with the sentiment from Sentiments Outlined. The sentiment was coloured with matching Copic markers and a few Create a Smile enamel dots added to finish.

For more inspiration why not check out the rest of the Uniko team over on their blogs?
Tomorrow is launch day and you'll be able to buy the whole release as well as the usual chance to win it by taking part in our blog hop!