Wednesday, 30 December 2015

Fave cards of 2015

Wow the year is almost at an end and as is traditional, I'm taking a walk down memory lane
and choosing my favourite non Christmas cards.
Debby 4000 is again hosting this fun event.


My first choice is a card I made with my newly acquired stash for being on the STAMPlorations DT
and one of my fave techniques.


I love this camouflage technique and for this ColourQ, inspired project I teamed STAMPlorations Eclectic Florals with an Avery Elle Love die.

***
I love CAS creations but I also like to stamp and colour with Copics, so I've chosen this little chap
on his tractor from Molly Bloom, no longer in business it seems or not producing new stamps.


I used a Sketch Saturday layout, creating this little scene with die cut clouds and DPs.

***
My next choice was a request from my daughter to make a card for one of my grandson's friends.
He was having a mini beast themed party, complete with a visit from the 'Bug Man'.
With no suitable stamps in the stash, I went with punch art creatures, a whole bunch of them.


The box card format suited the punch art creatures and I was told that it was still displayed on Ben's friend's shelf long after his birthday.

***
This next choice was such a satisfying card to make, as I really had to wrack my brains to come up with something for a DT project!


Over at Fantasy Stampers, Jan had chosen the theme of STEAMPUNK, not my kind of thing at all.
Anyway that's what being on a DT is all about, forcing yourself out of your comfort zone on occasions. As it is a stamped challenge I couldn't use a digi and I didn't have any stamps remotely related to the theme, except a few cog stamps that came free with a mag, so a little lateral thinking was involved!
In the end, with a little inspiration from a FUSION challenge and a Google Image search I came up with this. I was so pleased with the end result, even managing to use an embossing folder, a LOTV sentiment and kept it CAS.

***
As I've said before, I love to colour with Copics and these stamps by my wonderfully talented Bloggy friend and teamie Dee (Dee's Art Utopia) are a dream to use.


The layout was for a DT sketch challenge post over at STAMPlorations, I just had to use these new stamps and one of my favourite layouts.

***
Now I come to my final choice, I know the mathematically aware readers will have realized that this is my 6th card but as I hadn't included a watercolour card I just had to include this homage to the above mentioned Dee. 


Using my fave daisy stamps and an Avery Elle happy die I love the combination of soft background and crisp white daisies.

Thanks for stopping by and may I take this opportunity to wish everyone
a healthy and happy New Year.

I'm also joining in over at -

Clear it Out Challenge Blog
Favourite card of 2015

Saturday, 26 December 2015

Favourite Christmas cards of 2015

Welcome and I hope you all had a fabulous Christmas with lots of family fun.
My Grandson has gone to his other Nan for Boxing Day so the house is v v v quiet now. Even Max the dog is calm after yesterday's activity. He must have walked further yesterday as he followed me around the kitchen with his nose in the air, than if he had been on a log walk across the fields!
Any way back to crafty things.

It's becoming a bit of a tradition to look back at the past year and go through all those favourite makes.
As in previous years, Debby is hosting the favourite Christmas creations of your year, so I've been looking through my pics and trying to choose just 5 of my Christmas faves.
As usual it's a hard task as they are all loved to some extent but after a lot of deleting of possibles I ended up with a group that I think reflects my varied taste.
So here goes!


I've made Christmas cards all year around this year but in the end I seem to have gone with some of my more recent designs.First off the block is this card using MB's 'Glowing Candles' and my newly found product Inka Gold waxes, thanks Loll.


Love this die cut and I used a panel of embossed card coloured with washes of DI with the raised bits rubbed over with gold Inka Gold wax as a backing. The candles were cut in white card, then the foliage cut again in gold and green, trimming and overlaying to create this effect.

***

This little fella was made for a DT post for Cards und More and was chosen


as it reflects my passion for colouring and fussy cutting and for LOTV stamps.

***

I love a bit of masking and inking to create a scene and I chose this one because it had a bit of a twist, with the popped up circle.


 I had seen a similar design somewhere and had wanted to have a go for quite a while so my DT post at Fantasy Stampers was just the right time. I 'd eyed up the Christmas tree stamp from Heartfelt Creations for sometime and eventually bought it early in 2014 and have used the trio of spruce trees on quite a few occasions.

***

This next card reflects my CAS tastes, but I had to include this new stamp from LOTV, I purchased at my first ever visit to Port Sunlight Stamp Fair on a very foggy October morning this year.


I've been, vainly, trying to use up some of my old stash and I used some of my 4 year old linen effect cards for this one. The penguin is a trio stamp and I ended up using each stamp for 3 separate CAS cards. A little off cut of LOTV Frosty Christmas paper is tucked in behind this cheeky penguin.

My final card is a take on one I made last year which also made my top 5. This time I went flat as I knew exactly where this one was destined and needed to be post friendly.


Penny Black freebie stamp inked up with Festive Berries DI then w/c washed, masked off, then Stampendous Christmas words stamped and embossed in white. The florets were coloured then a little bit of glossy accents for depth and a few freehand leaves washed in with more green DIs. This time I used HP w/c paper not sure it worked any better than normal card but I was v pleased with the end result.

So that's that, as always a difficult decision but hope you liked them as much as I did making them.
Thanks for stopping by and many thanks to my followers old and new and all the wonderful people who have left such positive and encouraging comments over the last year,

Hope you all had a

 MERRY CHRISTMAS


Friday, 25 December 2015

Merry Christmas!

Well that was a dinner and a half, turkey and all the trimmings! No room for pud yet, just need to put my feet up and chill before the next course. 

Hope you all had or are having or going to have a brilliant Christmas and hope that Santa has been kind to you.
Santa has been very kind to me and I had a fabulous crafty stash under the tree this year, the miracle of the Amazon wish list!


So all I have to say is 
MERRY CHRISTMAS 
and a 
HAPPY NEW YEAR
 to all my followers and readers.

Friday, 18 December 2015

Holidays

Good afternoon peeps.
Welcome to a post to remind you of the monthly challenge over at STAMPlorations.
This month you can use the theme or the sketch or combine the two, I just went with the holiday theme for my DT card here.


I was inspired by a watercoloured card I saw on Google by Sanketi, there are some absolutely wonderful painted projects on her Etsy page!
To start, I die cut a bauble shape in a piece of scrap card and used the waste as a stencil laying it over my panel of w/c paper. With a clean brush full of plain water, I drew around the inside of the cut out and then filled the middle with a wash of water.
I then dropped in some DI in Festive Berries, Spiced Marmalade, Mustard Seed and some Chipped Sapphire for shadow. With a smaller brush I added the hanger in Black Soot and a little Chipped Sapphire, all very loose. I wasn't worried at this stage about the colours staying put!
When the bauble was dryish I washed some more clear water around where I wanted my foliage to be and then using the evergreen stamp from Dee's Artsy Impressions - Christmas Bell Medley, I stamped repeatedly with Evergreen Bough DI and a little bit of Chipped Sapphire for shadow. Again I wasn't worried about the ink spreading as it gave a soft edge to the stamping. As the water dried the stamping became clearer, giving the effect of depth to the bough. The sentiment from the same set was stamped with Versafine Onyx Black.
A strip of orange Core'dinations was added down the left edge before the painted panel was added to a base card.

 
or choose the sketch


or why not combine them both!

For further inspiration please check out the rest of the fabulous DT and our GD, the wonderful Rahmat Gouse.

I'd like to join in over at


Silent Night, Holy Night Christmas Cards!

        CYCI#99

a static badge for those who don't want to flash!
Feeling Festive

Take It, Make It Challenge
Take A Technique
Sharing The Season

Thursday, 17 December 2015

Purple Christmas

Good morning peeps.
This is a post to announce the start of the new challenge over at Cardz4Galz.
AS the big day is only a week away what better theme for this week than simply -

CHRISTMAS

Here is my DT card, one I made for my daughter in her favourite colours of purple with a hint of turquoise and lime green.


As I said I made this for my daughter and SIL as she saw one I made earlier and loved but it was a more CAS version . The wreath stamp is from Woodware, one of my favourite sets at Christmas. There are baubles as well as this wreath stamp and two fab sentiments. Unfortunately I've lost the really small sentiment that goes with it! Pulled the set out this time and it wasn't there, not in the bottom of the box of Christmas stamps, such a shame as it so useful!!!!!
Anyway enough of that, the card is pretty self explanetary, stamped wreath filled with bling and buttons, sequins and silver ribbons, plus a purple one to finish. The paper is from NitWits, Still Joyful set another of my faves. I must admit that my DP stock is not dwindling as I'm now using my computer to print off digi versions. It is supposed to save storage but I still can't bring myself to use the old stuff up.
Anyway that's about it from me, please check out the rest of the DT for more inspiration if you haven't already and please join us.

I'd like to join in over at -


Time Out photo inspiration ( I used the wreath as inspiration)


Please grab our logo
Anything Goes with a stamp and ribbon

Wednesday, 16 December 2015

Special Stamp Release

Hi, welcome to a special post to launch a new set of stamps from STAMPlorations by the very talented Dee of Dee's Art Utopia.

I've loved the stamp sets by Dee and this is no different. Here are a couple of cards that I made with this latest set called ANCHORED.


and here is what else you can find in the set.


I used the large anchor for both cards, words on the first and the wave stamp for the second.
For the first card I first inked over the bottom half of a white card panel using two colours of DI, Blueprint Sketch and Salty Ocean through a Nestled Circles Stencil. Then I stamped the anchor on white card, coloured in Copics, then fussy cutting it out, cutting away the rope section leaving just the anchor. I stuck the anchor onto another piece of card then cut it out again to give it extra strength as I wanted to attach a piece of string to the top. I glued the trimmed panel to a blue base then added a textured white frame on pads sandwiching the end of the string. Before sticking down I added banners with the sentiments to the underside of the frame.

For my second card I stamped and embossed in clear EP the waves and anchor, then washed in some of the same two DIs as before, careful to avoid getting any on the anchor itself. When dry I added a die cut U and R then wrote MY freehand as I didn't have any stamps!. The panel was trimmed using a pierced rectangle die and mounted on a scrap of navy blue, then onto a white base card.
Comment on this and the other girl's posts (links here) for a chance to win the set before 11:55 PST on 18th December.


I'd like to join in over at -


Thursday, 10 December 2015

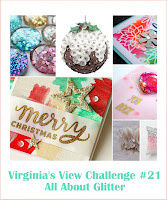
Less is More meets Muse and Virginia's View

Good afternoon peeps.
Just popping by to share a card I made last night but didn't photograph 'til this morning!
There are a few challenges out there that caught my eye this week. But they all came together when I saw the inspiration card over at Muse CV by Kimberly Weiner.
Here is my card.

and this is Kimberly's card.

My inspiration were the tree decorations, glitter and the holly only I used a MB die and the colours from Less is More, which I added as glitter to the main ball shape, so I will pop along and join in at Virginia's View too. I used pastel shades as the green glitter I had was quite pale. As I was using the colours from LIM, I left the holly leaves and berries white just replacing the white cut aways, glueing the three baubles flat onto a white base card, the greeting is from LOTV.

That's about it, thanks for stopping by.

I'd like to join in over at -

"Less is More"
Green and blue

December Challenge: All about Glitter      

Penguin Trio

Good morning and welcome to a new post to announce a new challenge over at Cardz4Galz.
As Christmas approaches we have a very appropriate challenge for you.

CUTE CHRISTMAS

So for my card I didn't have to think long about which stamp I was going to use.
The Penguin Trio set from LOTV is certainly cute so I thought I would use the third of the images from the set for this project.


This stamp set is pretty unisex so it's not only for girly cards. anyway I'm not exactly a girly girl!

Thinking about the sketch at CAS(e) this Sketch, I die cut some snowflakes to create a background on a plain white base. After stamping, colouring with Copics and fussy cutting I added an arc of white card stamped with a Woodware greeting and popped it up on pads. Job done!

For more inspiration please visit the Cardz4Girlz site and check out the fab DT inspiration and then why not join us. We'd love to see what you come up with.

I'd like to join in over at:-


Christmas Cards All Year Round
Keep it Simple

Tuesday, 8 December 2015

Stencil Hop

Hi and welcome to the latest blog hop at STAMPlorations. This time we are focusing on stencils.
Shery has recently expanded the range to include some larger stencils but I've use one of the regular sized one's with a festive twist, Holiday Words.


For my card I used the stencil as a stamp, covering the wrong side of the words with Versamark then placing it carefully on a white card panel then ran it through my Big Shot. Careful not to smudge the ink I removed the stencil then added silver EP. The bauble was die cut from the panel then I cut a few more from white scrap to make it stand away from the base. I glued them all together then inked with DI Salty Ocean and put it back into the embossed panel. The ribbon from my stash was added then the panel was trimmed and added to a white base card.


Comment on this post and the other STAMPlorations girl's blogs for a chance to win some fab prizes.
For more details check out the main STAMPloration site.
Check out what the rest of the team made! You'll find links to all our projects here.

I'd like to join in over at -


The ribbons, colours and tree decorations in the picture were my inspiration.


Cardz4Guyz

Morning again. I'm back to announce a new challenge over at Cardz4Guyz.
This week is our last challenge before the Christmas holiday's and our topic is -

TRADITIONAL CHRISTMAS COLOURS

So just time to get a few more Christmas cards completed!

My card uses a traditional image in traditional colours!


I think Christmas is one of the times when flowers are allowed on a fella's card!
I've already sent this card and it's been received so I feel I can now share it with you all.
This is a Penny Black stamp which I stamped on w/c paper using Festive Berries DI before masking and over stamping with a Stampendous Holiday Words stamp, embossed in white. I made a similar card last year but this one does not have so many chunky embellishments and so is post friendly! 
The red bracts of the poinsettia were painted with the same Festive Berries plus a little bit of Chipped Sapphire for the shadows. I washed in some more DI in a mixture of greens, sketching in some green leaves freehand. The tiny yellow flowers were coloured with Copics, then some Glossy Accents. The sentiment from the same set as the flowers, was stamped in black then the panel was glued flat onto a red base card.

Ok, that's it from me, please check out the rest of the DT for even more inspiration then why not join us this week.

Please do grab our logo to display on your own blog
Anything Goes with a stamp

     
                                                           Pick a previous Challenge

True Love

Good morning folks and welcome to my monthly post to announce a new challenge over at Cards und More. 
This time we have an interesting theme to tempt you -

MAKE AN EVERLASTING CARD

I must admit that I have never made one of these before and was a little daunted but hey, I'll give it a go!
After a lot of web browsing and head scratching I found this video on You Tube and you can actually download the templates from the link! I didn't use the downloads but I did take the idea and ran with it.


This photo doesn't really let you see what it is really like so I did try a little video to show you how it works. It's not as professional as the YOU Tube one but I hope you get the idea.


The image I started with is from this week's sponsor, Sparkle and SprinkleVW Bus.
The set has more images but I just used the Love surrounded by flowers.
For the other words I digitally removed the LOVE and then printed out the 3 remaining panels and drew the words, TRUE, NEVER and ENDS freehand matching the font of the original as near as possible. 
After colouring with Copics I assembled the card as per instructions on the video here.
I was quite pleased that it actually worked when I had finished. 

There are lots of other videos out there that give you instructions on the assembly of this style of card so why not have a play around and join us. For more inspiration please check out the Cards und More blog and the rest of the DT.


Thanks for stopping by.