Showing posts with label Party Confetti Stencil. Show all posts

Saturday, 17 August 2019

Revisiting Big n Bold Wish, Blog Hop and Giveaway at Uniko

Good morning Uniko fans, its time to give a little love to a previously released stamp set.
This month the set we are revisiting is the Big and Bold stamp set and matching dies.
Here's my inspiration for you.
BBWishDDiesBIG&BOLDWishPP


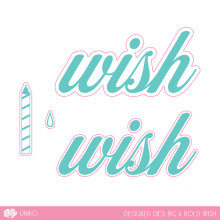
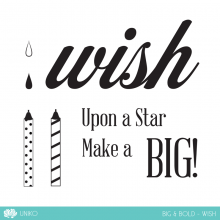
I've used the candles, 'Make a' and 'wish' stamps together with both the matching wish dies.
It's another idea sparked by too much You Tube watching earlier in the year!
Always on the look out for a different card idea I stumbled on this idea by the very creative Jennifer McGuire, a double Z fold card

So apologies for the next few paragraphs, hope you can follow all the instructions!

To start I cut a panel of bright blue card measuring 5"x 10" and scored it at 21/2" and 5", followed by
a second piece of white card cut at 4" x 9", scored at 4" and 61/2".
The blue panel was then stencilled using the Confetti stencil and a contrasting blue ink then put to one side to dry.
On the white panel a line of candles was stamped along the bottom of the large square section in Versamark and embossed with white EP, before colouring with my Zig water brush pens.

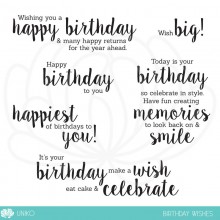
When dry, I stamped this greeting from Birthday Wishes in black on the middle panel, the last panel was kept blank for a handwritten greeting.

BirthdayWishesPP

From a scrap of vellum I cut the largest of the wish dies and from a scrap the same blue card as the background, I cut out the second size wish. Placing the leftover outer from the blue in my MISTI, I positioned the 'wish' stamp in the space and then closed the MISTI door. The blue wish die cut was then placed back into the outer and stamped with Versamark and embossed with white EP. I find this the best way to ensure that the stamping is centred on the die cut. 
After gluing the two layers together I attached them above the candles and stamped the 'Make a' in black.


To complete, 2 panels of silver mirror card were cut measuring 41/4" by 21/8" and 4/1/4" square.
The small panel was glued to the top small blue section and the larger to the large blue square section.
The white section was attached, large square section to small silver one and small white to large silver.
If you struggled to follow this and you would prefer more visual instructions, check out the video here.

So for the chance to win the complete Big and Bold Wishes stamp set and matching dies, just leave a comment here then hop along leaving comments as you go. You have until Saturday 24th August at midnight BST to leave your comments

Julie - that'll be me


I'm joining in over at:-


Tuesday, 8 May 2018

Even More Stencil Fun

Morning, a very busy week here in the craft room with more inspiration using the new May release from Uniko.
First off the rank is this pink delight.


This uses the new Stylized Floral stencil and Simply Said Blocks II plus the older but goody Pure Florals Cosmos.
I channelled my inner Jennifer McGuire again for this card using the Rotating Stencil Technique.
I started with a panel of pink card inked with Picked Raspberry DOx, then rotated and the process repeated. Placing the stencil over the inked panel again, I inked through with white pigment ink.
Using an Avery Elle die, I cut the angled panel of white linen effect card and popped it over the inked panel. The sentiment was stamped with the same DOx on a strip of white card and glued in place. I decided it looked a little too spartan so added the blooms, coloured with Copics and fussy cut.

My second card uses the Confetti stencil, bigger brother to the stamp released last year. Just to prove that stencils are just as useful as stamps, if not more so I made this.


On a panel of white card, I attached the stencil with masking tape and using a small Versamark pad, I inked through it, then after carefully removing the stencil heat embossed the card with white EP.
Using diluted DI in a rainbow of colours, I washed in the rainbow effect. When completely dry I die cut a rectangle from the panel and buffed up the surface with a dry babywipe.
I didn't want to detract from the panel so added some white die cut balloons and another sentiment form Simply Said blocks II, I can see this getting a lot of use, this time heat embossed in silver. I used the layout from the girls at Less is More to place them.
So that's it from me for the moment, back tomorrow with more inspiration.

There's even more  inspiration from the rest of the team.
GD - Anna
Jane 
Julie - that's me
Linda

Introducing... 5th - 11th May 2018, here you will see a closer look at the products being released with a daily blog hop with the Uniko DT.

Release Day! Saturday 12th May 2018 9am BST you will get to see the products in their entirety and purchase them HERE on the website! As usual there will be a Design Team Blog Hop & GIVEAWAY!

Extra PRIZE Info! Alternative prizes will be offered to those that may already own the prize offered. Winners will be announced on Saturday 11th on the Winners Page HERE

               Joining in over at:-


Grab our Badge!
                                              Flowers