Showing posts with label Big and Bold Wish dies. Show all posts

Tuesday, 2 February 2021

Happy 9th Birthday Uniko

Good morning, it's party time!
Uniko is celebrating its 9th Birthday today. I take my hat off to Bev for managing to keep the brand fresh all by herself, as well as being mom to two very active boys, especially over the last year! I haven't been on the team for all that time but I have been an admirer from the moment I found the designs.


A birthday wouldn't be a birthday without a party, now would it? Over the years its become a bit of a tradition to hold a linky party to celebrate.

To join in all you have to do is simply create a birthday card, any theme, any style and using any product you like and link it up via the linky on the Uniko site. You don't have to have a blog to enter, you can link your card from your Instagram, Facebook, Pinterest or like with all challenges, you can email Bev your entry.

You don't have to use Uniko products, but we'd love to see you using your Uniko stash (including Uniko Digital Freebies via the link on the blog or ones from Magazine Features), there's an extra opportunity to win a prize if you do.

So here is my birthday card to get the party started.


To start my design, I took a panel of MM paper and heat embossed in white, a row of 9 candles from the Big n Bold Wish stamp set.
Each candle was then coloured in rainbow colour order, using Zig markers. The flames were coloured  and a warm glow added with a wash of yellows. The rest of the panel was finished with a wash of Salty Ocean DI and dark blue Zig pen towards the bottom.
The sentiment, from Birthday Sentiments, stamped with Altenew's Pure Graphite ink, was then embossed with clear gloss EP. Using an MFT stitched rectangle, I die cut the painted panel and mounted it flat on to an A6 side fold note card from my stash.

There are some more fab birthday cards by the Brand Ambassadors over on the Uniko blog. Why not check them out and leave some love along the way for the chance to win a prize!

Need a little more incentive to join in on the fun? How about some prizes.

  • Main winner chosen by the DT - £25 eGift Certificate
  • Random Uniko stamps winner - In stock clear stamp set of winners choosing (any value)
  • Top 5 chosen by DT - In Stock £5 clear stamp set of winners choosing
  • Two randomly selected comments from the Design Team Hop - In stock £5 clear stamp set of winners choosing

That's a total of NINE chances to win! 
Winners will be announced Sunday 7th March 2021 along with all the other 9th Birthday Celebration Winners.

Why not take advantage of this fabulous discount code too! The code celebrate9 is valid for the whole month of February 2021 and can be used on any order placed, even if you place multiple orders during the month!

So what's stopping you? 

Don't forget to leave a comment before you leave, you might miss out on a prize!

Happy Hopping!

I'm joining in over at:-

die-cut/ embossing/ blue


Saturday, 17 August 2019

Revisiting Big n Bold Wish, Blog Hop and Giveaway at Uniko

Good morning Uniko fans, its time to give a little love to a previously released stamp set.
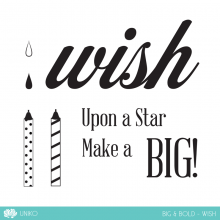
This month the set we are revisiting is the Big and Bold stamp set and matching dies.
Here's my inspiration for you.


BBWishDDiesBIG&BOLDWishPP


I've used the candles, 'Make a' and 'wish' stamps together with both the matching wish dies.
It's another idea sparked by too much You Tube watching earlier in the year!
Always on the look out for a different card idea I stumbled on this idea by the very creative Jennifer McGuire, a double Z fold card

So apologies for the next few paragraphs, hope you can follow all the instructions!

To start I cut a panel of bright blue card measuring 5"x 10" and scored it at 21/2" and 5", followed by
a second piece of white card cut at 4" x 9", scored at 4" and 61/2".
The blue panel was then stencilled using the Confetti stencil and a contrasting blue ink then put to one side to dry.
On the white panel a line of candles was stamped along the bottom of the large square section in Versamark and embossed with white EP, before colouring with my Zig water brush pens.

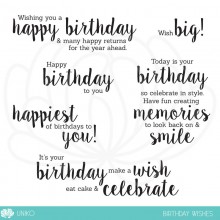
When dry, I stamped this greeting from Birthday Wishes in black on the middle panel, the last panel was kept blank for a handwritten greeting.


BirthdayWishesPP

From a scrap of vellum I cut the largest of the wish dies and from a scrap the same blue card as the background, I cut out the second size wish. Placing the leftover outer from the blue in my MISTI, I positioned the 'wish' stamp in the space and then closed the MISTI door. The blue wish die cut was then placed back into the outer and stamped with Versamark and embossed with white EP. I find this the best way to ensure that the stamping is centred on the die cut. 
After gluing the two layers together I attached them above the candles and stamped the 'Make a' in black.


To complete, 2 panels of silver mirror card were cut measuring 41/4" by 21/8" and 4/1/4" square.
The small panel was glued to the top small blue section and the larger to the large blue square section.
The white section was attached, large square section to small silver one and small white to large silver.
If you struggled to follow this and you would prefer more visual instructions, check out the video here.

So for the chance to win the complete Big and Bold Wishes stamp set and matching dies, just leave a comment here then hop along leaving comments as you go. You have until Saturday 24th August at midnight BST to leave your comments

Julie - that'll be me


I'm joining in over at:-


Saturday, 4 May 2019

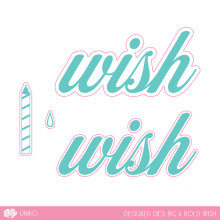
Introducing BIG & BOLD Wish Designer Dies

Good morning.
I hope you are going to have a great Bank Holiday weekend. The weather is not so good here, rather nippy if truth be told so a good excuse to stay indoors and get crafty!
Its day 3 of the Uniko May release and today we are  again showcasing a die set to match an existing stamp set, Big and Bold Wish. 

Here's my inspiration for you.


Instead of using the wish word dies, I chose to focus on the small candle and flame die.
The sentiment was inked up in a variety of overlapping inks to create a rainbow effect. My die cut panel was then cut repeatedly with the two dies. I found a few feint pencil lines help to get the layout square. To create the shadow effect, I cut the candles again bit in black fun foam before replacing them in the openings and adding back the white ones.

Quite an effective technique if a tad fiddly.
There are even more ideas on the rest of the DT's own blogs, so pop over for a look and be even more inspired.

Julie-that'll be me
Linda
Lindsey

Come back tomorrow for the big release and blog hop with prizes!