Showing posts with label MOD Background Builder stencil. Show all posts

Sunday, 11 February 2024

Happy Birthday Uniko, 12 Today and a Party!

Good morning folks.
Today we are celebrating Uniko's 12th Birthday with a birthday blog hop and giveaway!
Bev and the BAs are sharing birthday cards for your inspiration.
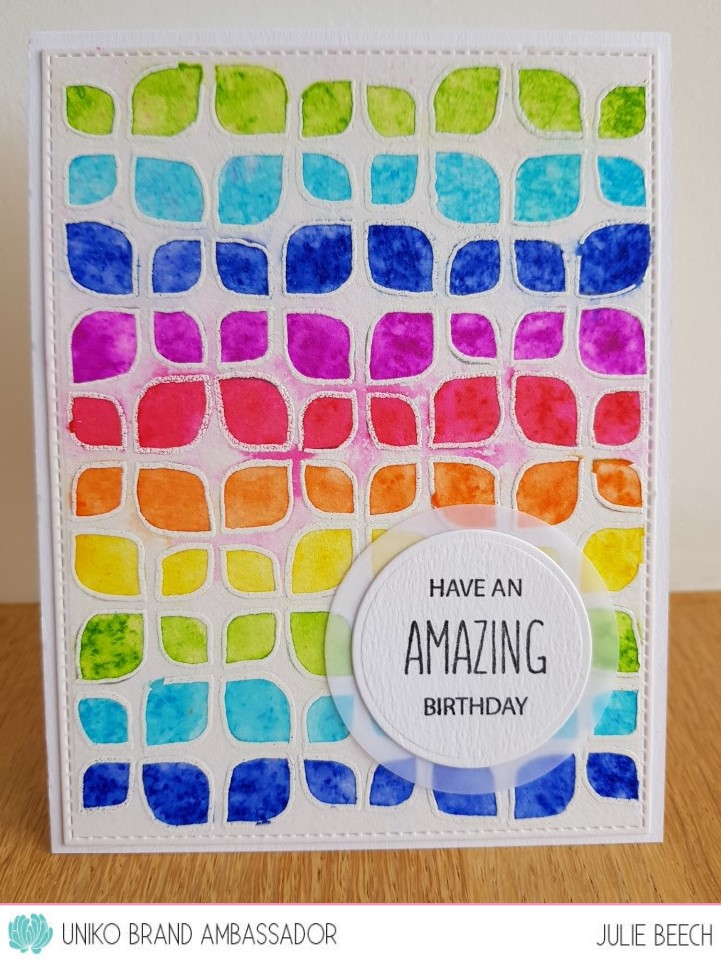
Here's mine.


When the MOD Background Builder stencil was released last year I had lots of ideas buzzing around in my head and this was one of them, to use the small additional stencil elements to create an all over background style card. I wasn't too sure of of the accuracy of my stencil placement, so went with a fussy cut design using just the two triple corner elements.

The trio of petal shapes were used to create both the green leaves as well as the flowers, using just two for the leaves and adding an extra for the flowers. The stamens were added in the same way using Seedless Preserve over Kitsch Flamingo DI. The leaflets were initially inked in Twisted Citron DI, then again with Mowed Lawn DI towards the bottom. After fussy cutting the elements, I arranged them onto an A6 panel of white card, adding flower centers with a yellow dot stamped from Wonderful Day and die cut with the small circle die in Big n Bold Happy!
I fussy cut the stamped sentiment made from Birthday Sentiments and You Are Sentiments Outlined, placing them flat over the background panel..

So all you have to do now, is link up your own birthday card to the Uniko blog for a chance to win a fabulous prize of a 25£ e gift voucher to spend in store!


Here are the links to the rest of the team, should you need more birthday inspiration!


There is plenty of time to join in on the fun.
The deadline for submission is midnight (GMT) on Thursday 29th February 2024.

 Prize - £25 eGift Certificate 

Party Rules
Use Uniko Products Only*.
No back linking. Linked cards/projects must be new.
Maximum Enteries 3 Per Person.

*If you don't own any physical Uniko products you are welcome to use THESE FREE Uniko Digital images to create your card. 
Don't use social media or have a blog to upload your card & link from? 
No worries, just drop Bev an email bev@uniko.co.uk titled Uniko 12th Birthday with a photo and she will upload it for you.

Friday, 13 January 2023

Release Day, Blog Hop and Giveaway

Good morning. It's release day at Uniko and we are giving you the chance to win the whole release in our blog hop. Just leave a comment as you hop along to win, simples!! The stamps and stencil are also available to purchase here.

My first card using the new release, combines Mid Century Modern Frames and Purrfect for this 50's inspired card.


The largest of the frames was stamped followed by the cat outline. I didn't need to mask it off as I was going to colour it with black Copic. I also stamped a few of the small atomic elements in black. The sentiment is from the frames set too.

Keeping with the cat set, I created this fun card.


I used a Sizzix plate die for the circular openings as well as a couple more made using a punch. The solid cat was stamped in various directions with Memento Tuxedo Black onto the largest 7 circles, adding the features with clear EP and white gel pen. The smaller circles were placed back into the panel and secured at the back with tape, the stamped ones placed in and similarly secured before adding to a white base card. A sentiment combining the Mid Century modern Frames and Purrfect sets completes.

My next card is very simple and uses the BB Mid Century Linear Lines stamp.


I simply stamped and embossed the lines a few times in my MISTI to build up the dimension then added the sentiment, So Much, with Jewelled Gold EP and fussy cut. The finished panel was added to a matching base card on pads.

Now do you remember my stencil panel card from yesterday? Well here is the other half in another masculine birthday card.


I simply trimmed the leftover panel down, cut it into two and popped both pieces up on pads onto an A6 base card with the sentiment from Floral Vines stamped in black in the gap. It was a bit of a faff to get all the different colours inked onto the panel so I'm pleased I managed to make two cards from the one panel!

So what do you think? I know I've had fun playing with the new release and I know the rest of the girls have had a fun time playing too. For the chance to win the full release hop along to leave some love as Bev will be drawing one lucky commenter from blogs and social media to win.

Julie - that's me

So don't forget to leave a comment here before you hop along, Bev will draw the winners on Saturday 21st January.
Happy hopping!

Thursday, 3 November 2022

Uniko's Stencil Release Day & GIVEAWAY!

Good morning it's release day over at Uniko. 
Here a few more ideas using the November release stencils.

First off the block is the MOD background Builders.
For this example I've used some more purchases from Ruthin, some WOW foil and WOW Bonding powder.


Don't you just love the sheen, well until you try to take a pic that is, then it's an absolute nightmare!!

The bonding powder is so easy to use, inking through the main part of the stencil with Versamark on black, the bonding powder is added and heated, as with EP, before adding the foil and running through any old laminator. I did try to make a pattern with a mix of rose and plain gold foil, cutting small pieces of the rose gold and then overlaying a larger piece of gold, then running it through a laminator in a piece of A4 copy paper folded as a carrier. You can see where one of the small pieces shifted 'twixt desk and laminator but it still looks so pretty!! The sentiment was done the same except it was first stamped with Versamark. I only bought a couple of colours of foil so may have to hunt out a few more, it is addictive.

My second card uses the Flower Power stencil, concentrating this time on just the leaf elements


After masking off the solid leaves a random selection of leaves were inked with a light covering of Spiced Marmalade, Festive Berries and Vintage Photo DI before inking again with the detail leaf stencil and the same colours. Gaps were filled with dots from the large detail leaf stencil. Another of my Doodle Flower sentiments complete.

My next card uses Large Snowflake #1 and the Large Snowflake die.


Using the Large Snowflake #1 stencil over navy card, I spread white embossing paste and left to dry. I found this silver die cut snowflake in the stash and thought it a great way to amp up the design. I simply added it over the embossed snowflake, followed by a sentiment from Christmas Sentiments on matching navy card.
Finally here's a card using the other Large Snowflake stencil #2.


Simply inked in Altenew's Aqualicious ink over pale turquoise card, then again slightly off with Unicorn pigment ink to create the shadow. A few sequins from the stash and a sentiment from Simply Said Blocks Christmas complete

That's all from me but the rest of the team have come up with some fantastic ways to use these fab new stencils, so why not check them out on their own blogs.
Be sure to leave a comment on all our blogs or social media post as Bev will be randomly selecting one lucky winner to receive all of the stencils being released today. You have until Midnight Wednesday 9th November to leave comments and I will announce the winner Thursday 10th November 2022. 

Monday, 31 October 2022

Uniko Introducing... MOD Background Builder Stencil

Morning all!
The first of our November release at Uniko features a very versatile background stencil. Here's how I used it.


Trying to think outside the box, I decided to use my new WOW embossing pen I picked up from Lavinia Stamps shop in Ruthin, where the OH took his car for a recall from Subaru. He just happened to mention that there was a craft shop around the corner so I 'volunteered' to accompany him on his hour and a bit journey!!
I first drew around the stencil with a pencil on a panel of MM paper, then painted the opening with Zig watercolour markers. I tried using the WOW pen alone but was more successful following the soft pencil outlines!! After embossing with some white EP, I spritzed the panel with water and dabbed the excess inky water with some kitchen paper. I think I ended up with more on the kitchen paper than the MM panel!! I do like the mottled effect I got though, even if there was a little leakage.

The panel was die cut using a stitched rectangle die, mounted on a matching base card and the sentiment added. The sentiment was made up from words from the Doodle Flower set, stamped on a matching card circle, mounted on a die cut vellum one.

 That's all from me for today but why not check out what the rest of the Brand Ambassadors have been up to? I'll be back tomorrow with another stencil introduction.

 Anita

Jane

Julie - that's me